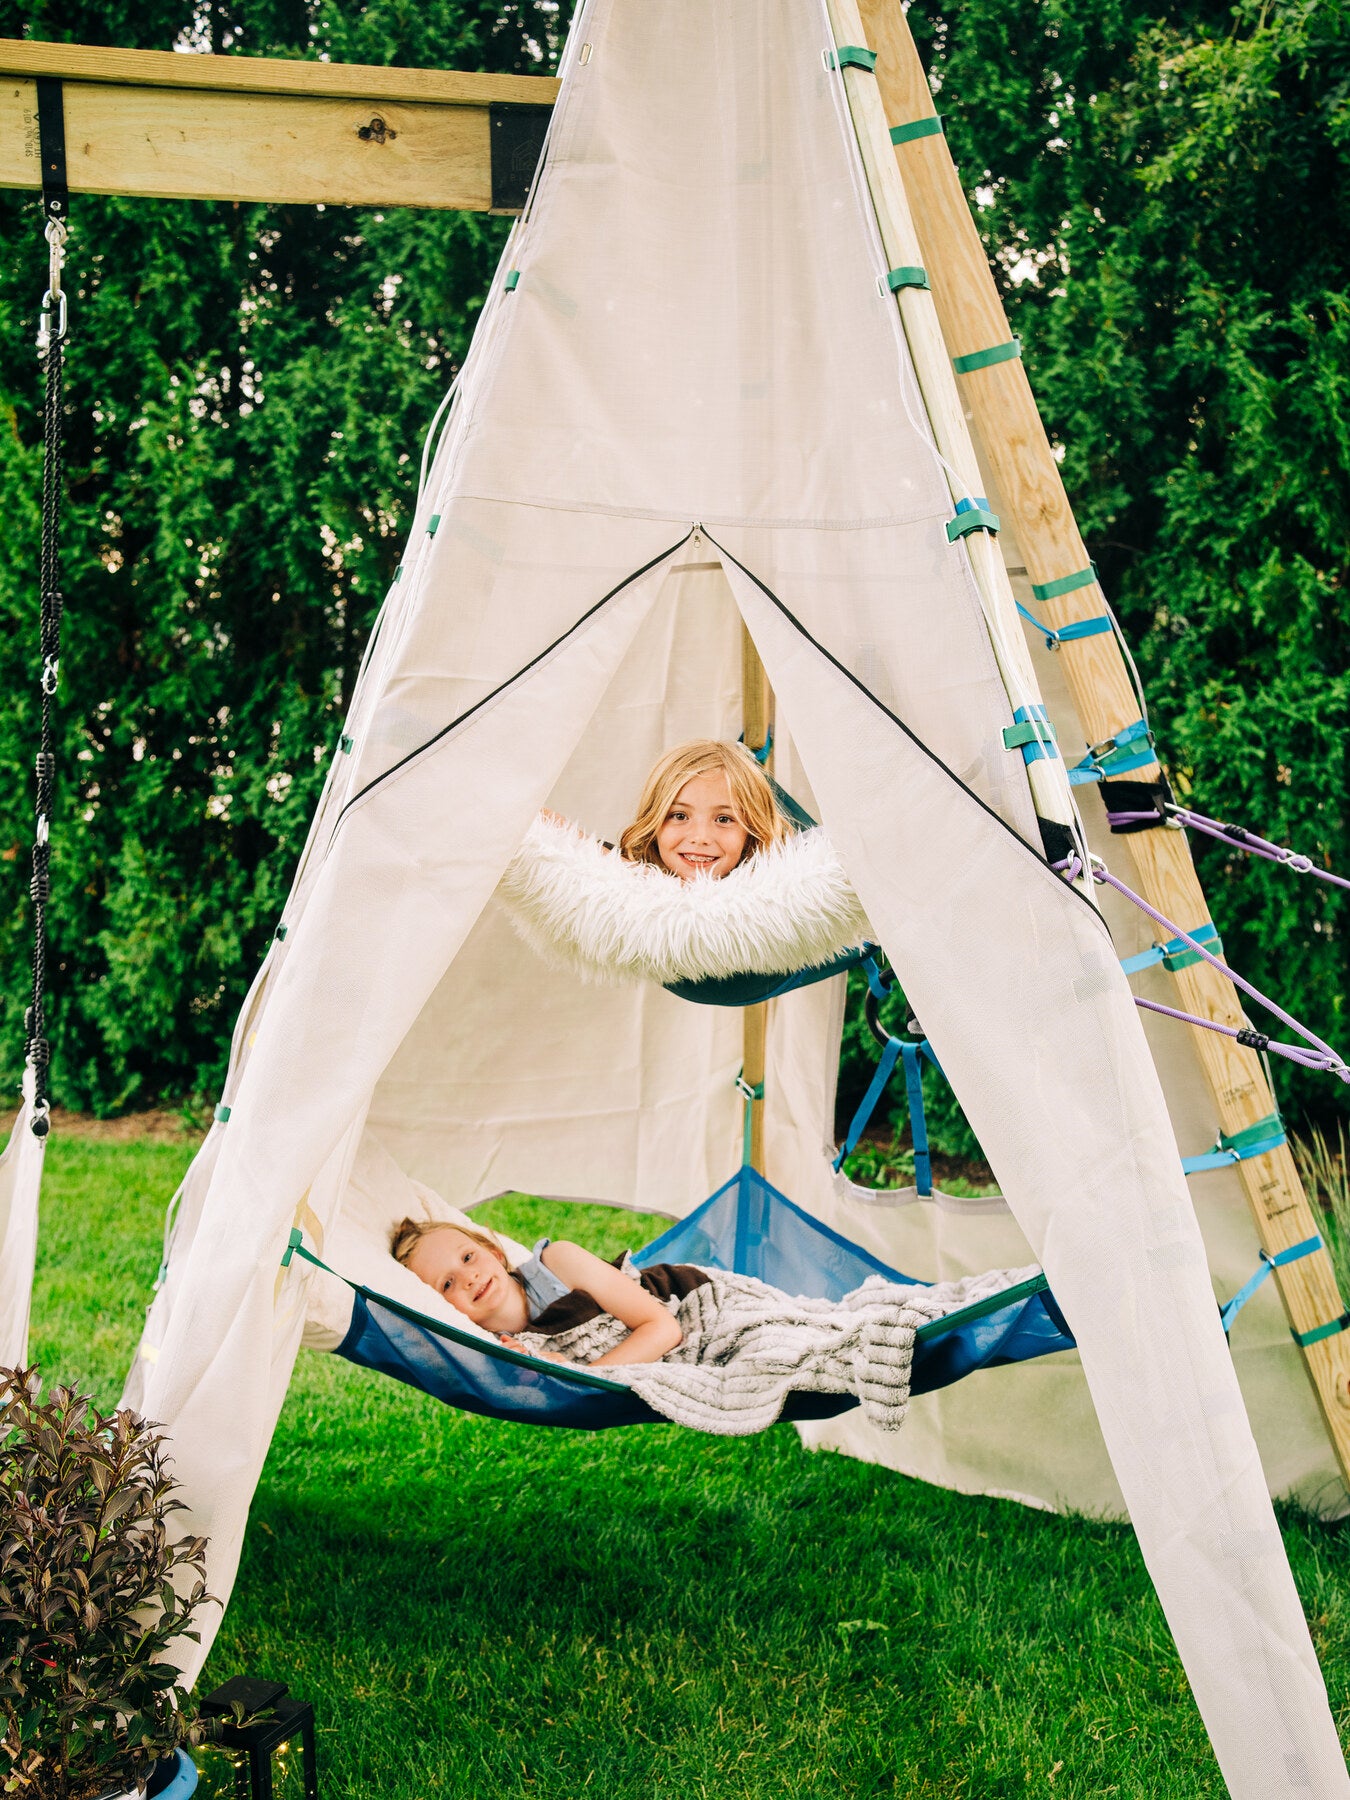
Bijou Mainstay Assembly
with this one-of-a-kind, nature-inspired space for families. 2,000+ families have reclaimed their backyard—join the movement for adventure in modularity!

You’ll Need The Following:

Pressure Treated Wood

What’s In The Box

Power Screwdriver

6ft Tall Ladder

20ft Of Setup Space

Optional: Rubber Mallet
Free Shipping (Continental U.S. Only)

Easy, Hassle-Free Return Process

100% Satisfaction Guarantee

5-Year Manufacturer's Warranty

Ships In 1-3 days From The U.S.A

Free Shipping (Continental U.S. Only)

Easy, Hassle-Free Return Process

100% Satisfaction Guarantee

5-Year Manufacturer's Warranty

Ships In 1-3 days From The U.S.A

1
Connect Brackets To Wood
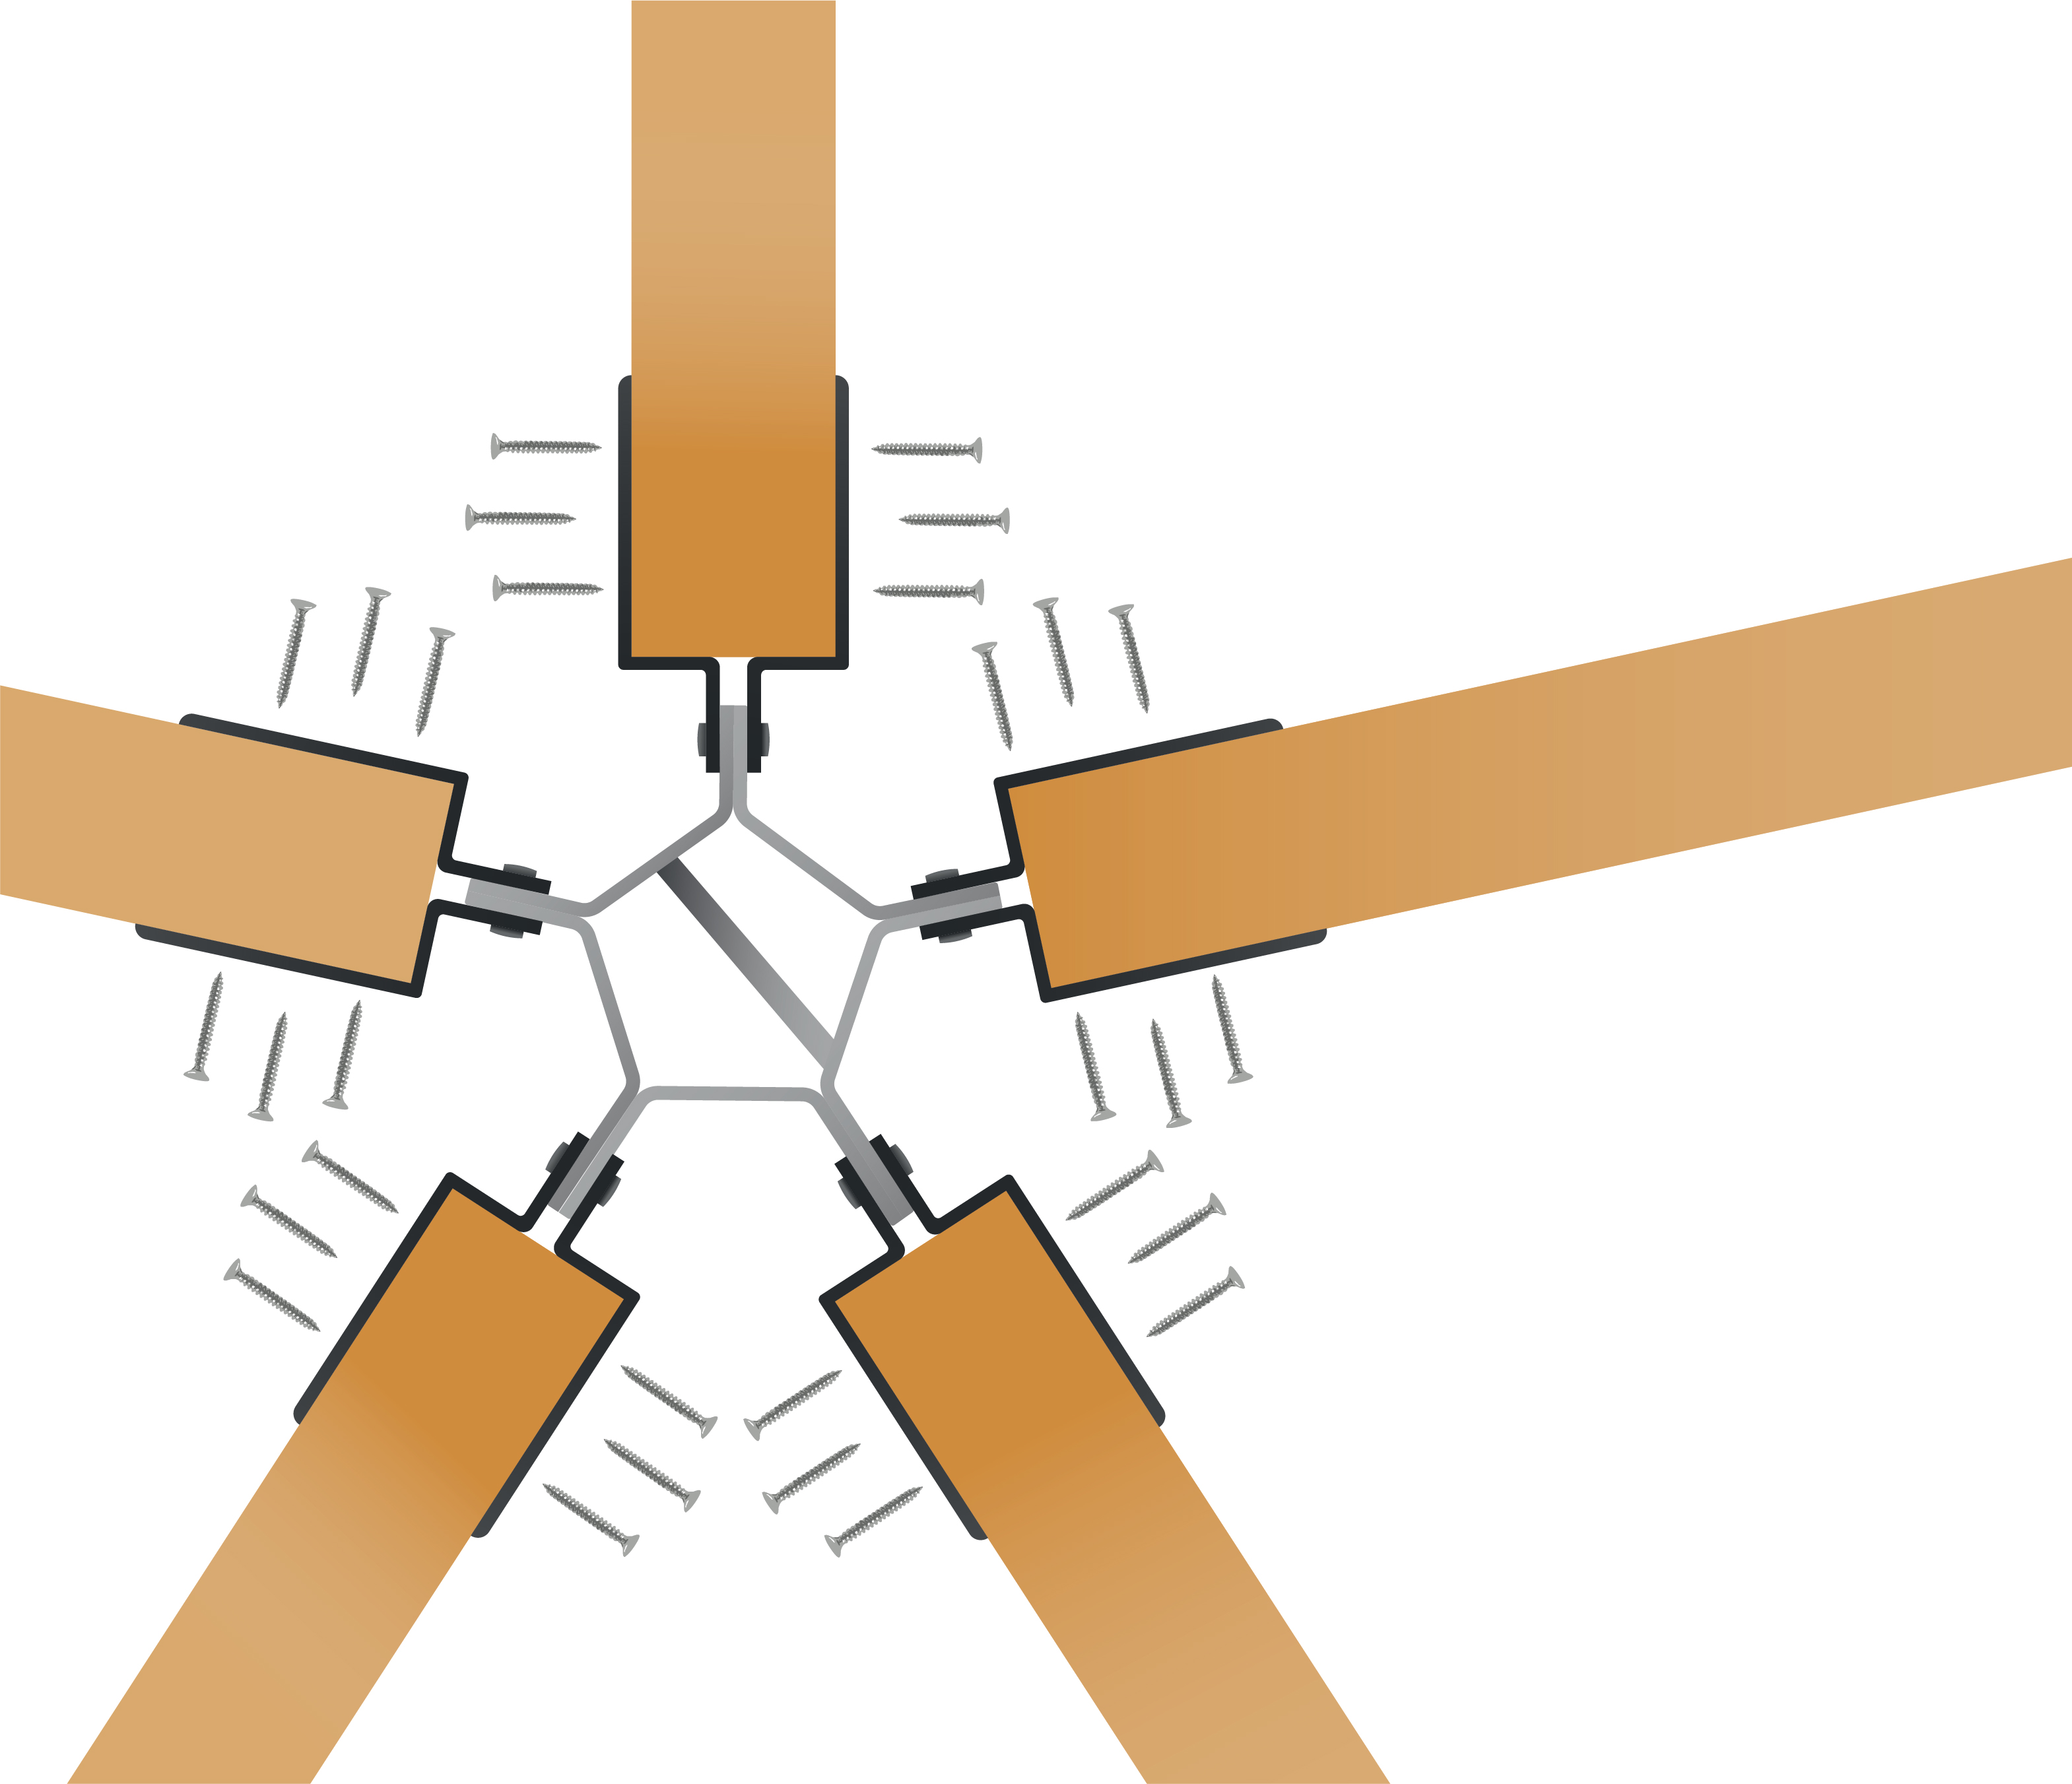
1
Connect star hub To Wood
1. Lay out the wood around the star hub. You will need minimum 20' of space to do this.
Note: Keep bolts loose at this time so you can fit the wood. Once all screws are secure, tighten the bolts with included tools.
2
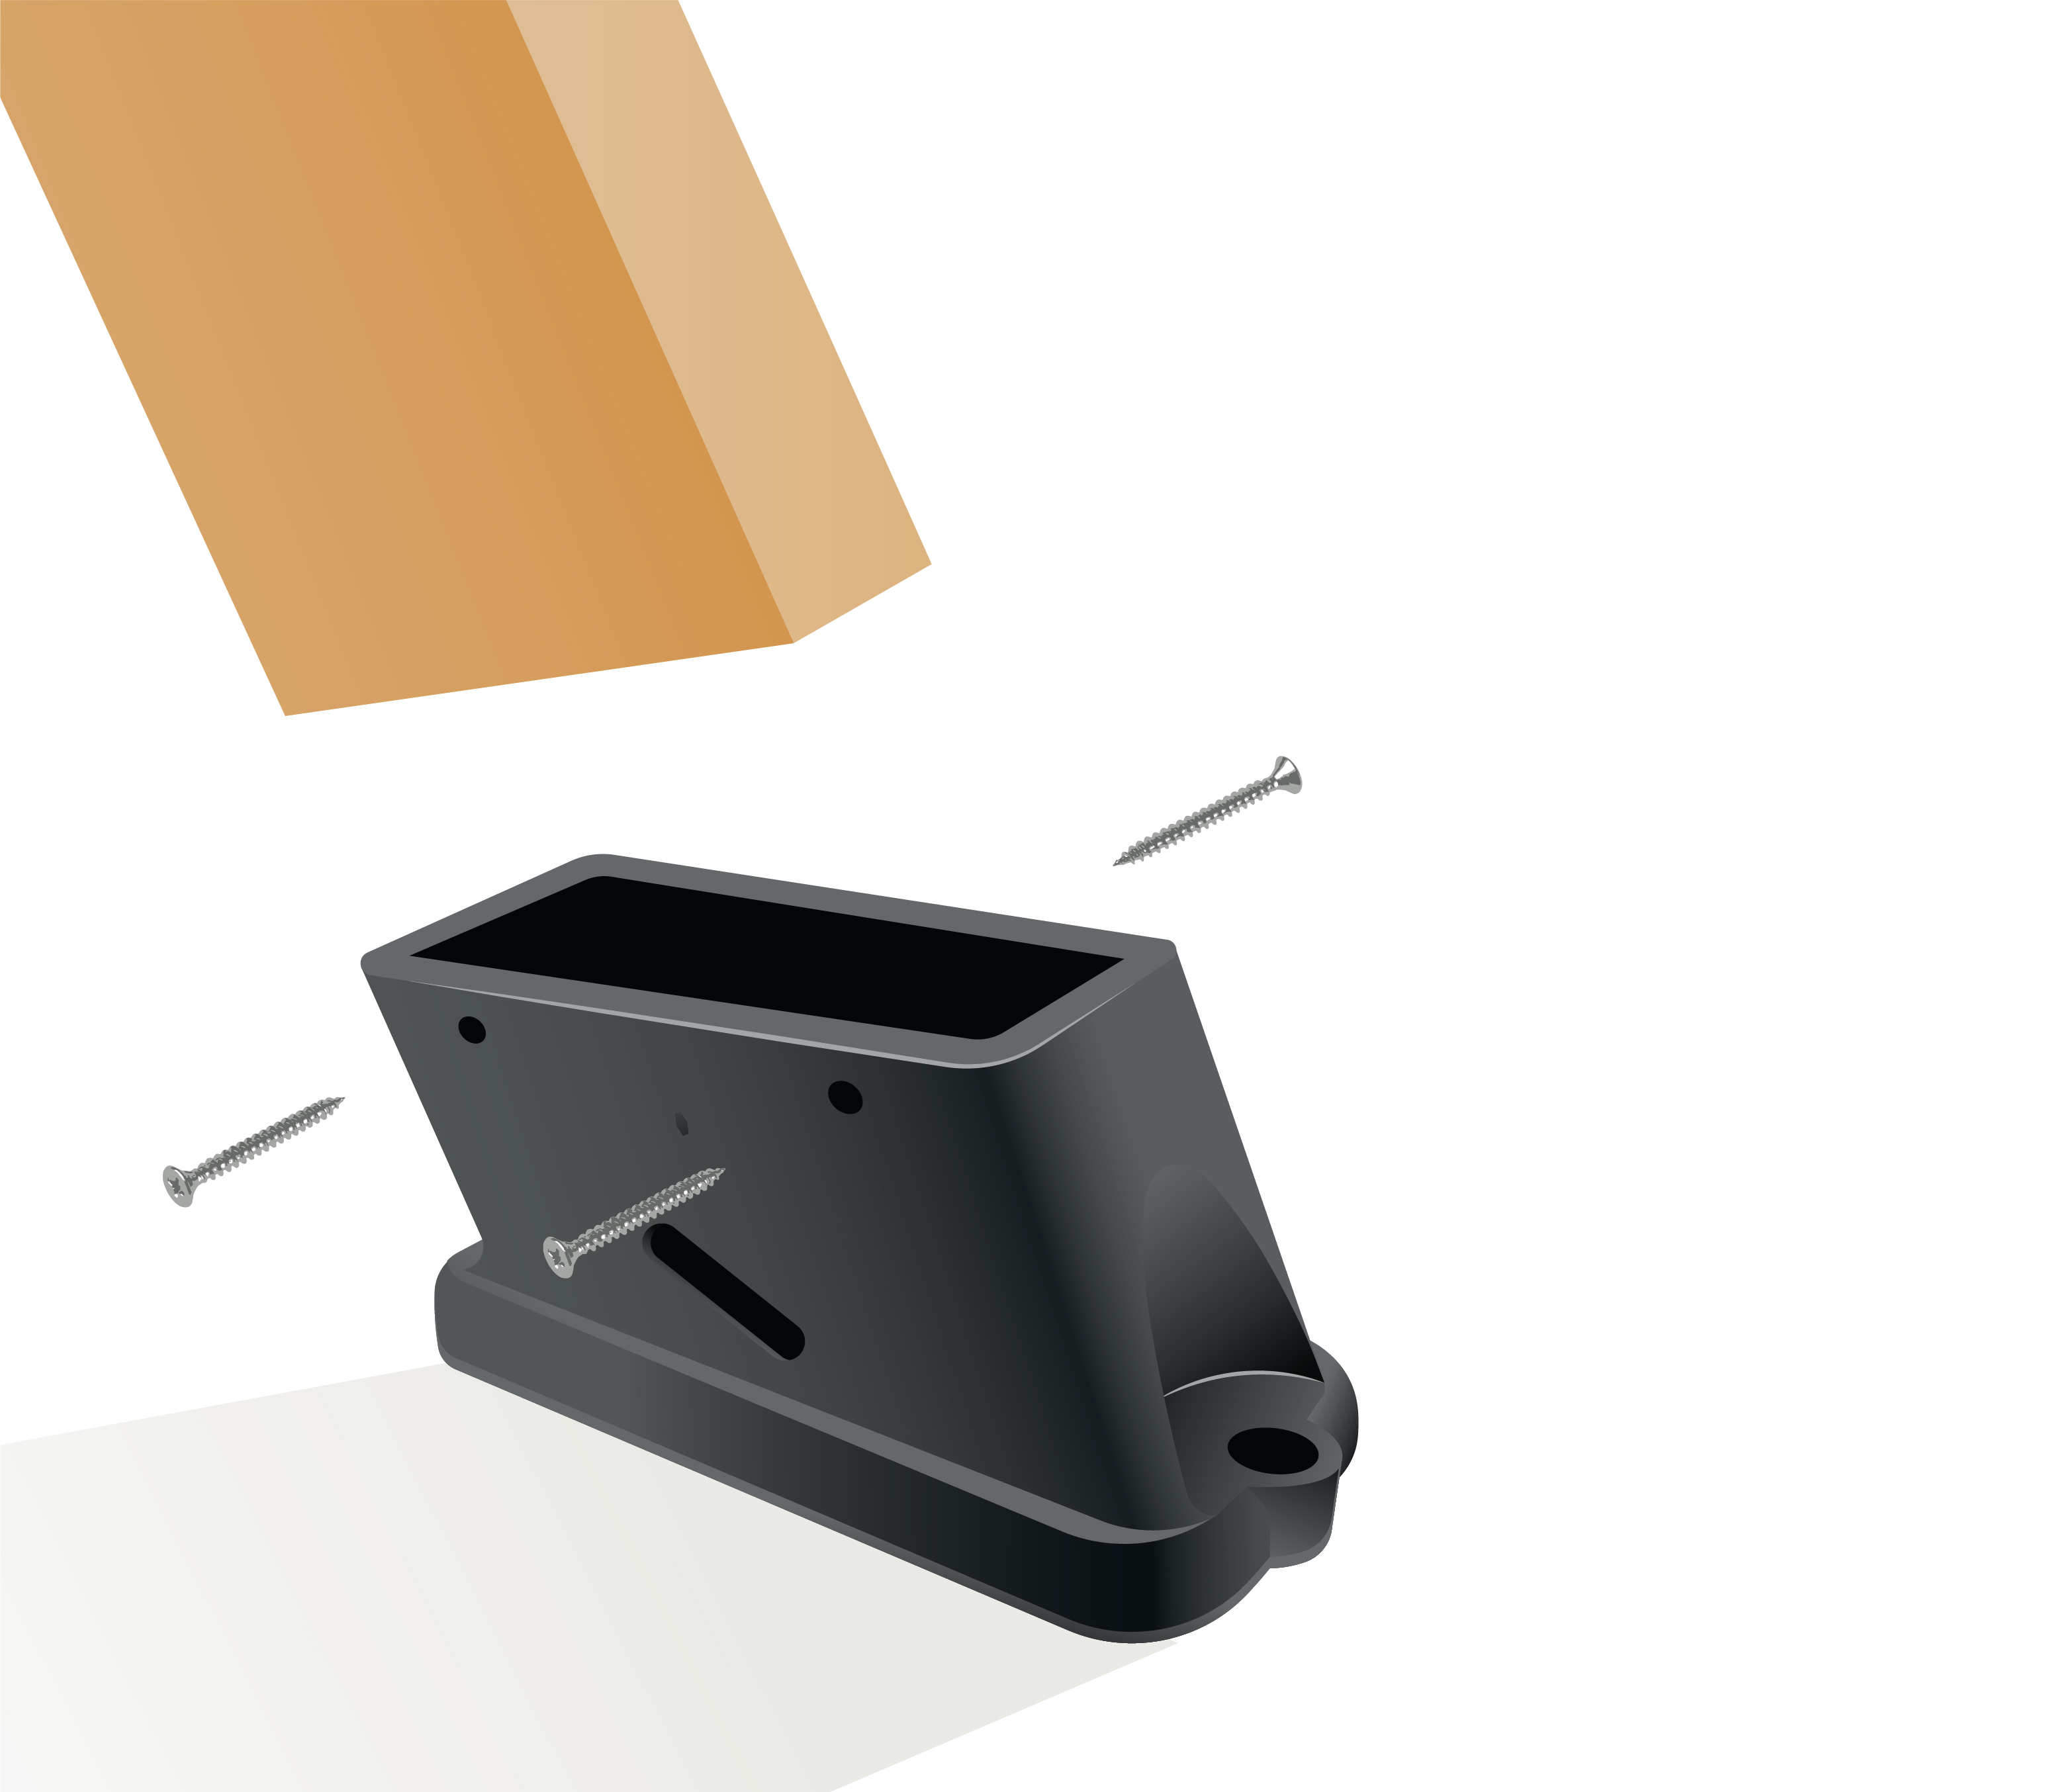
Attach The Anchor Feet
1. Make sure the Bijou is still laid out around the star bracket.
2. Face the side of the anchor foot to the outside of the Bijou.
3. Secure the anchor foot on opposite end of the metal brackets you installed in step two.
1. Make sure the Bijou is still laid out around the star bracket.
2. Face the side of the anchor foot to the outside of the Bijou.
3. Secure the anchor foot on opposite end of the metal brackets you installed in step two.

2
Attach The Anchor Feet
3
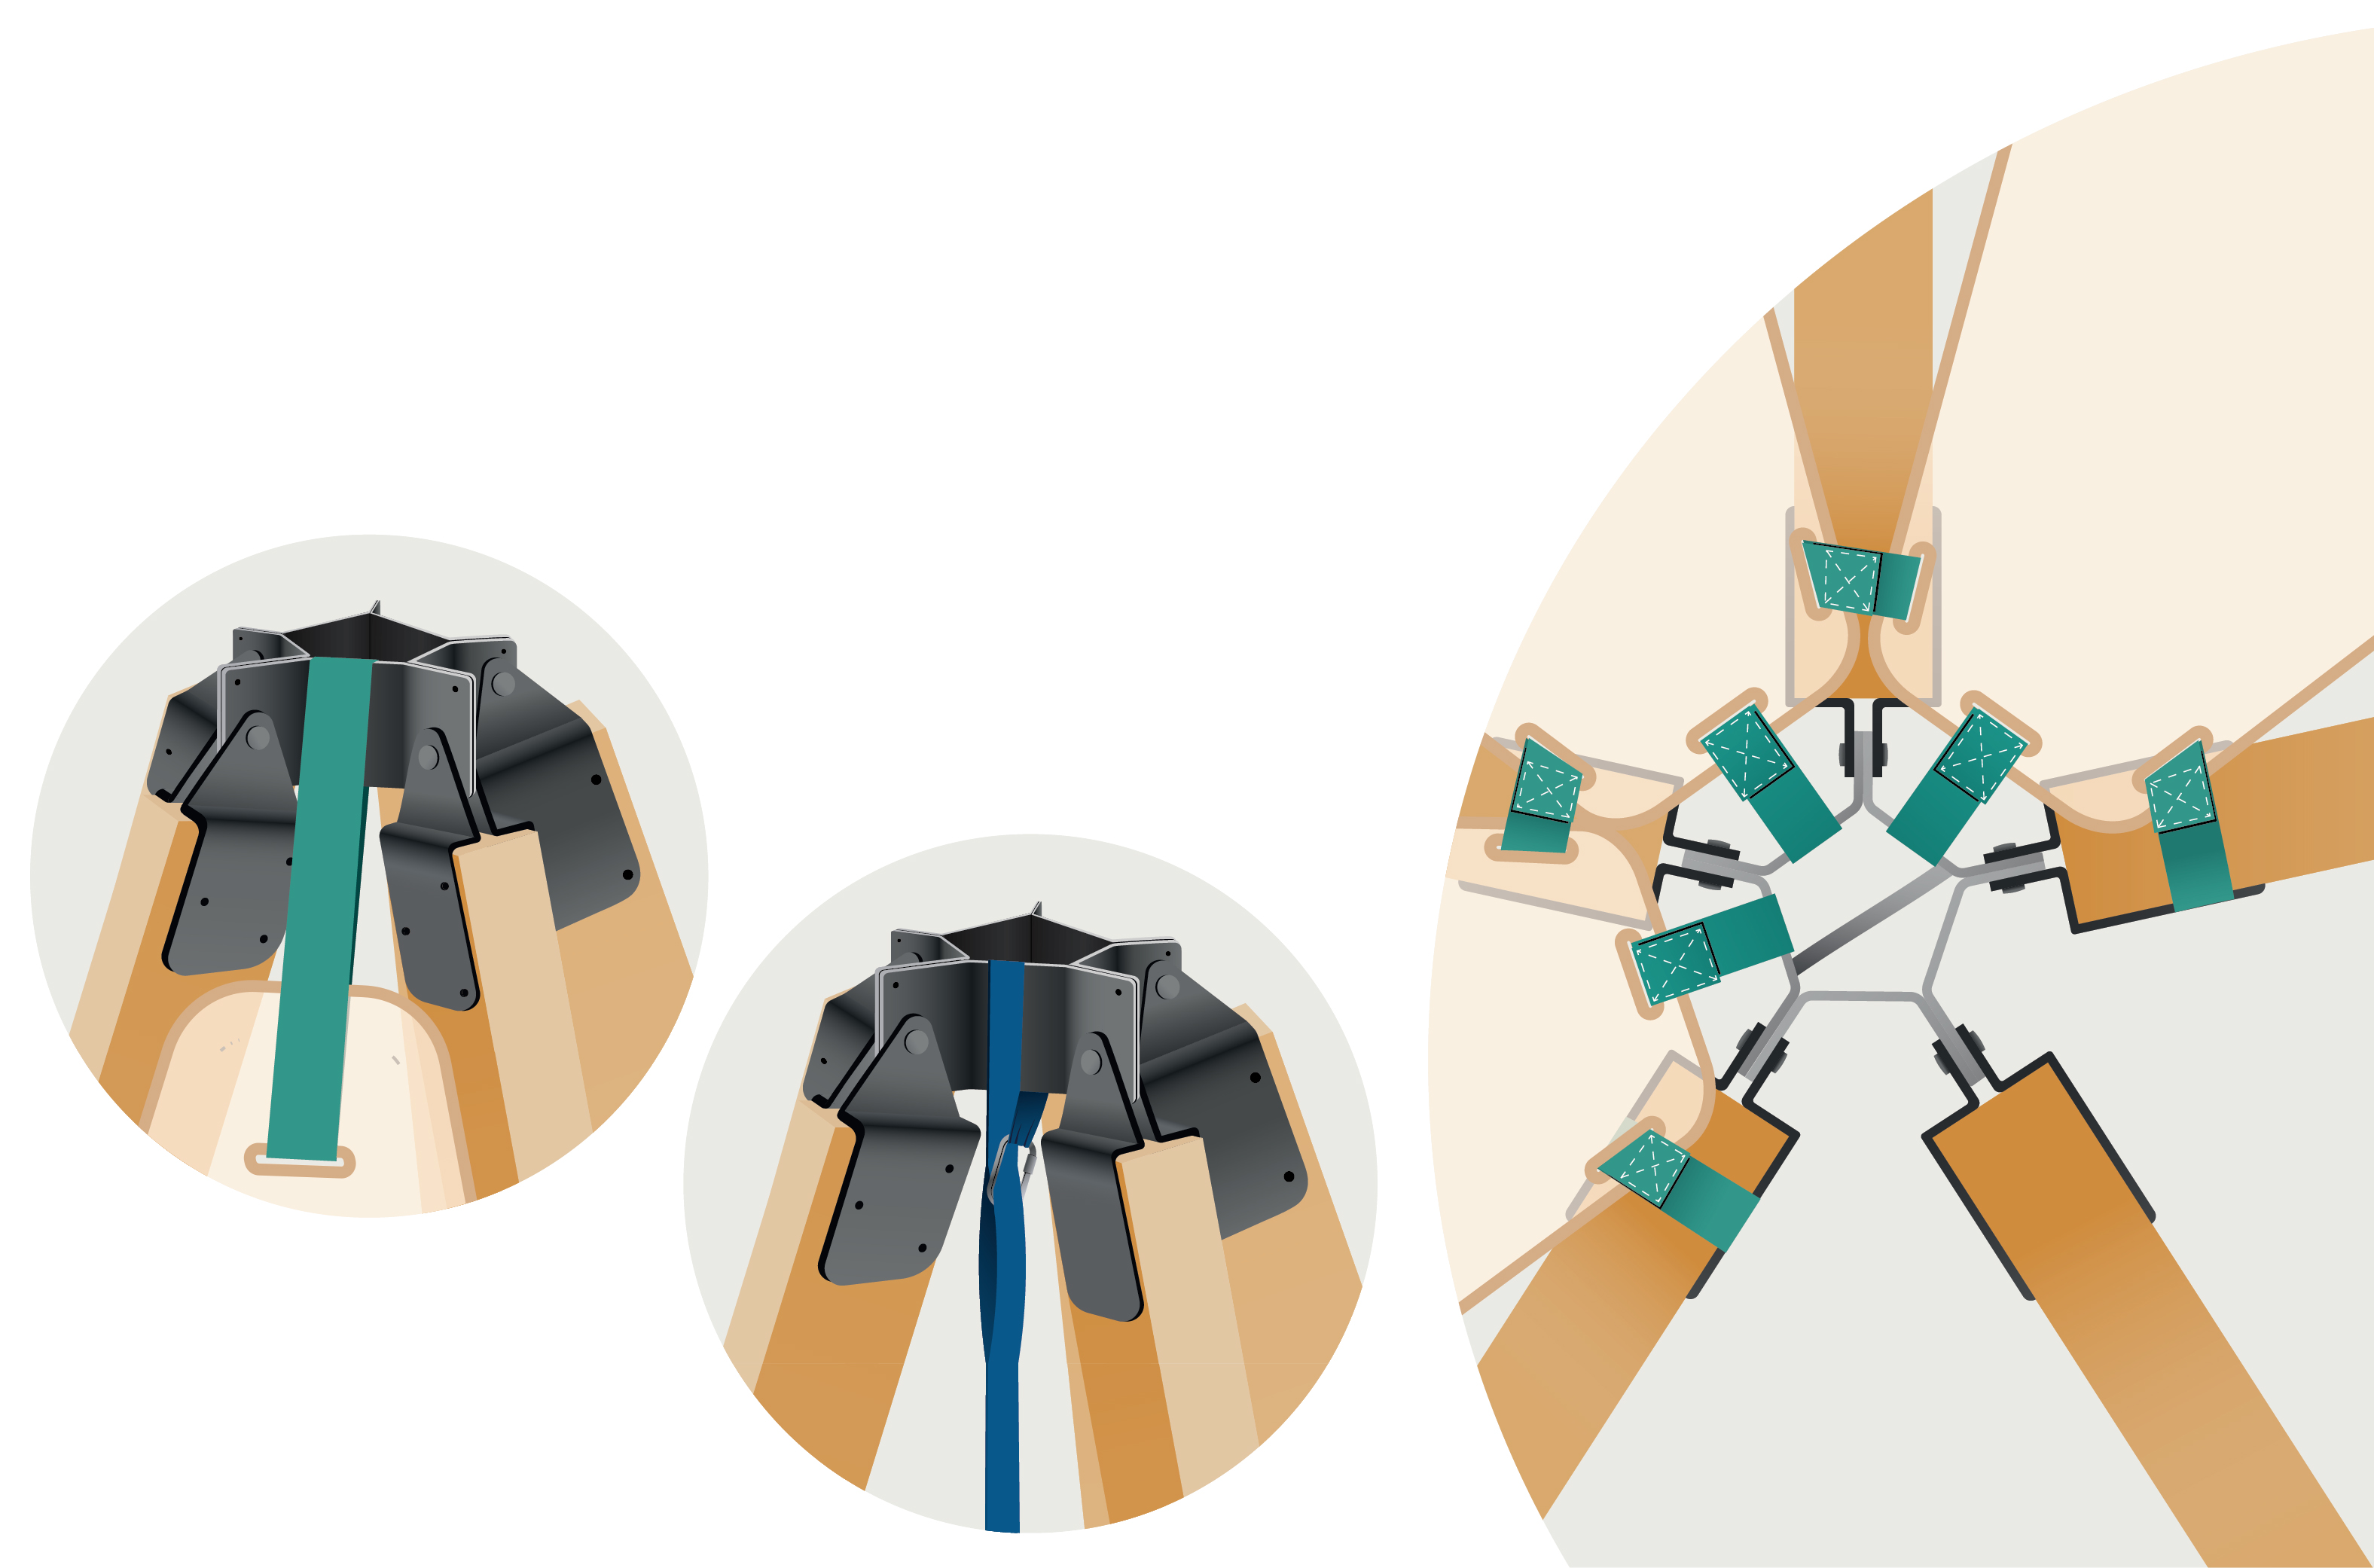
Attach Panels And Cargo Net To The Star Hub
3
Attach Panels And Cargo Net To The Star Hub
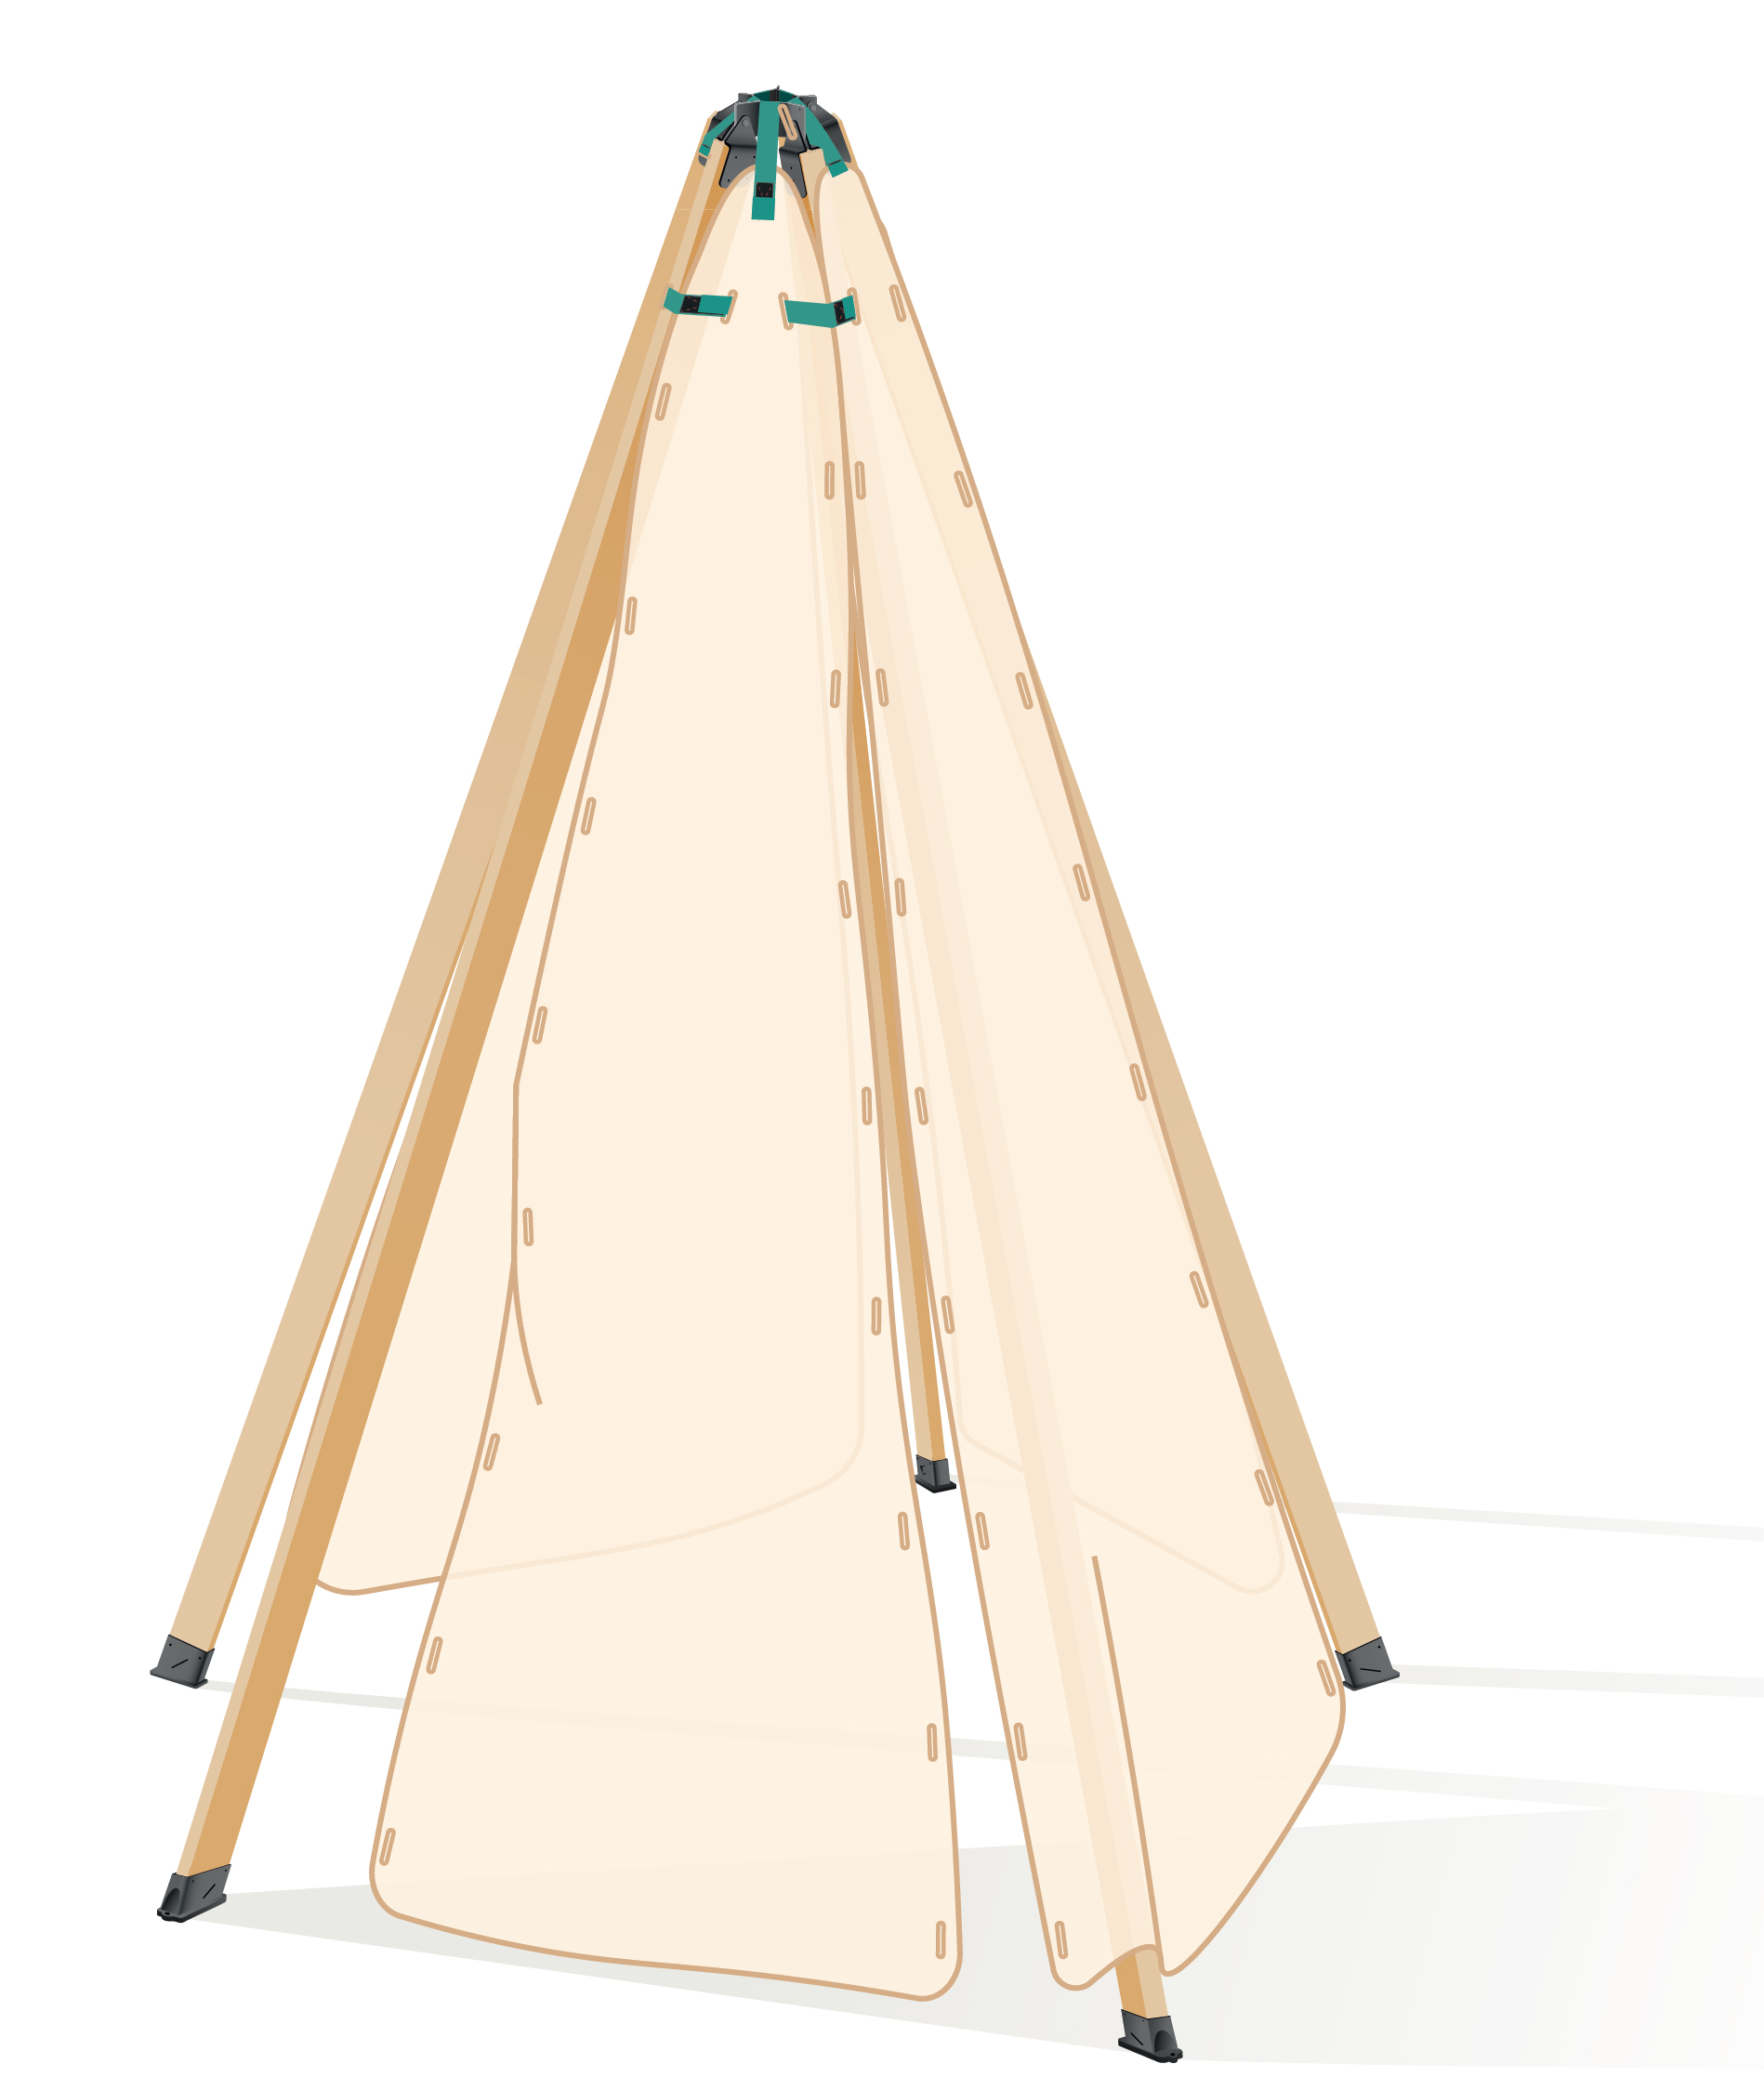
1. Lay your panels out with seams facing down in whatever order you choose.
2. Attach the top of the panels to the star hub by attaching the green strap to the top grommet.
3. Have the velcro on the outside, place the strap over the hub and back through the grommet.
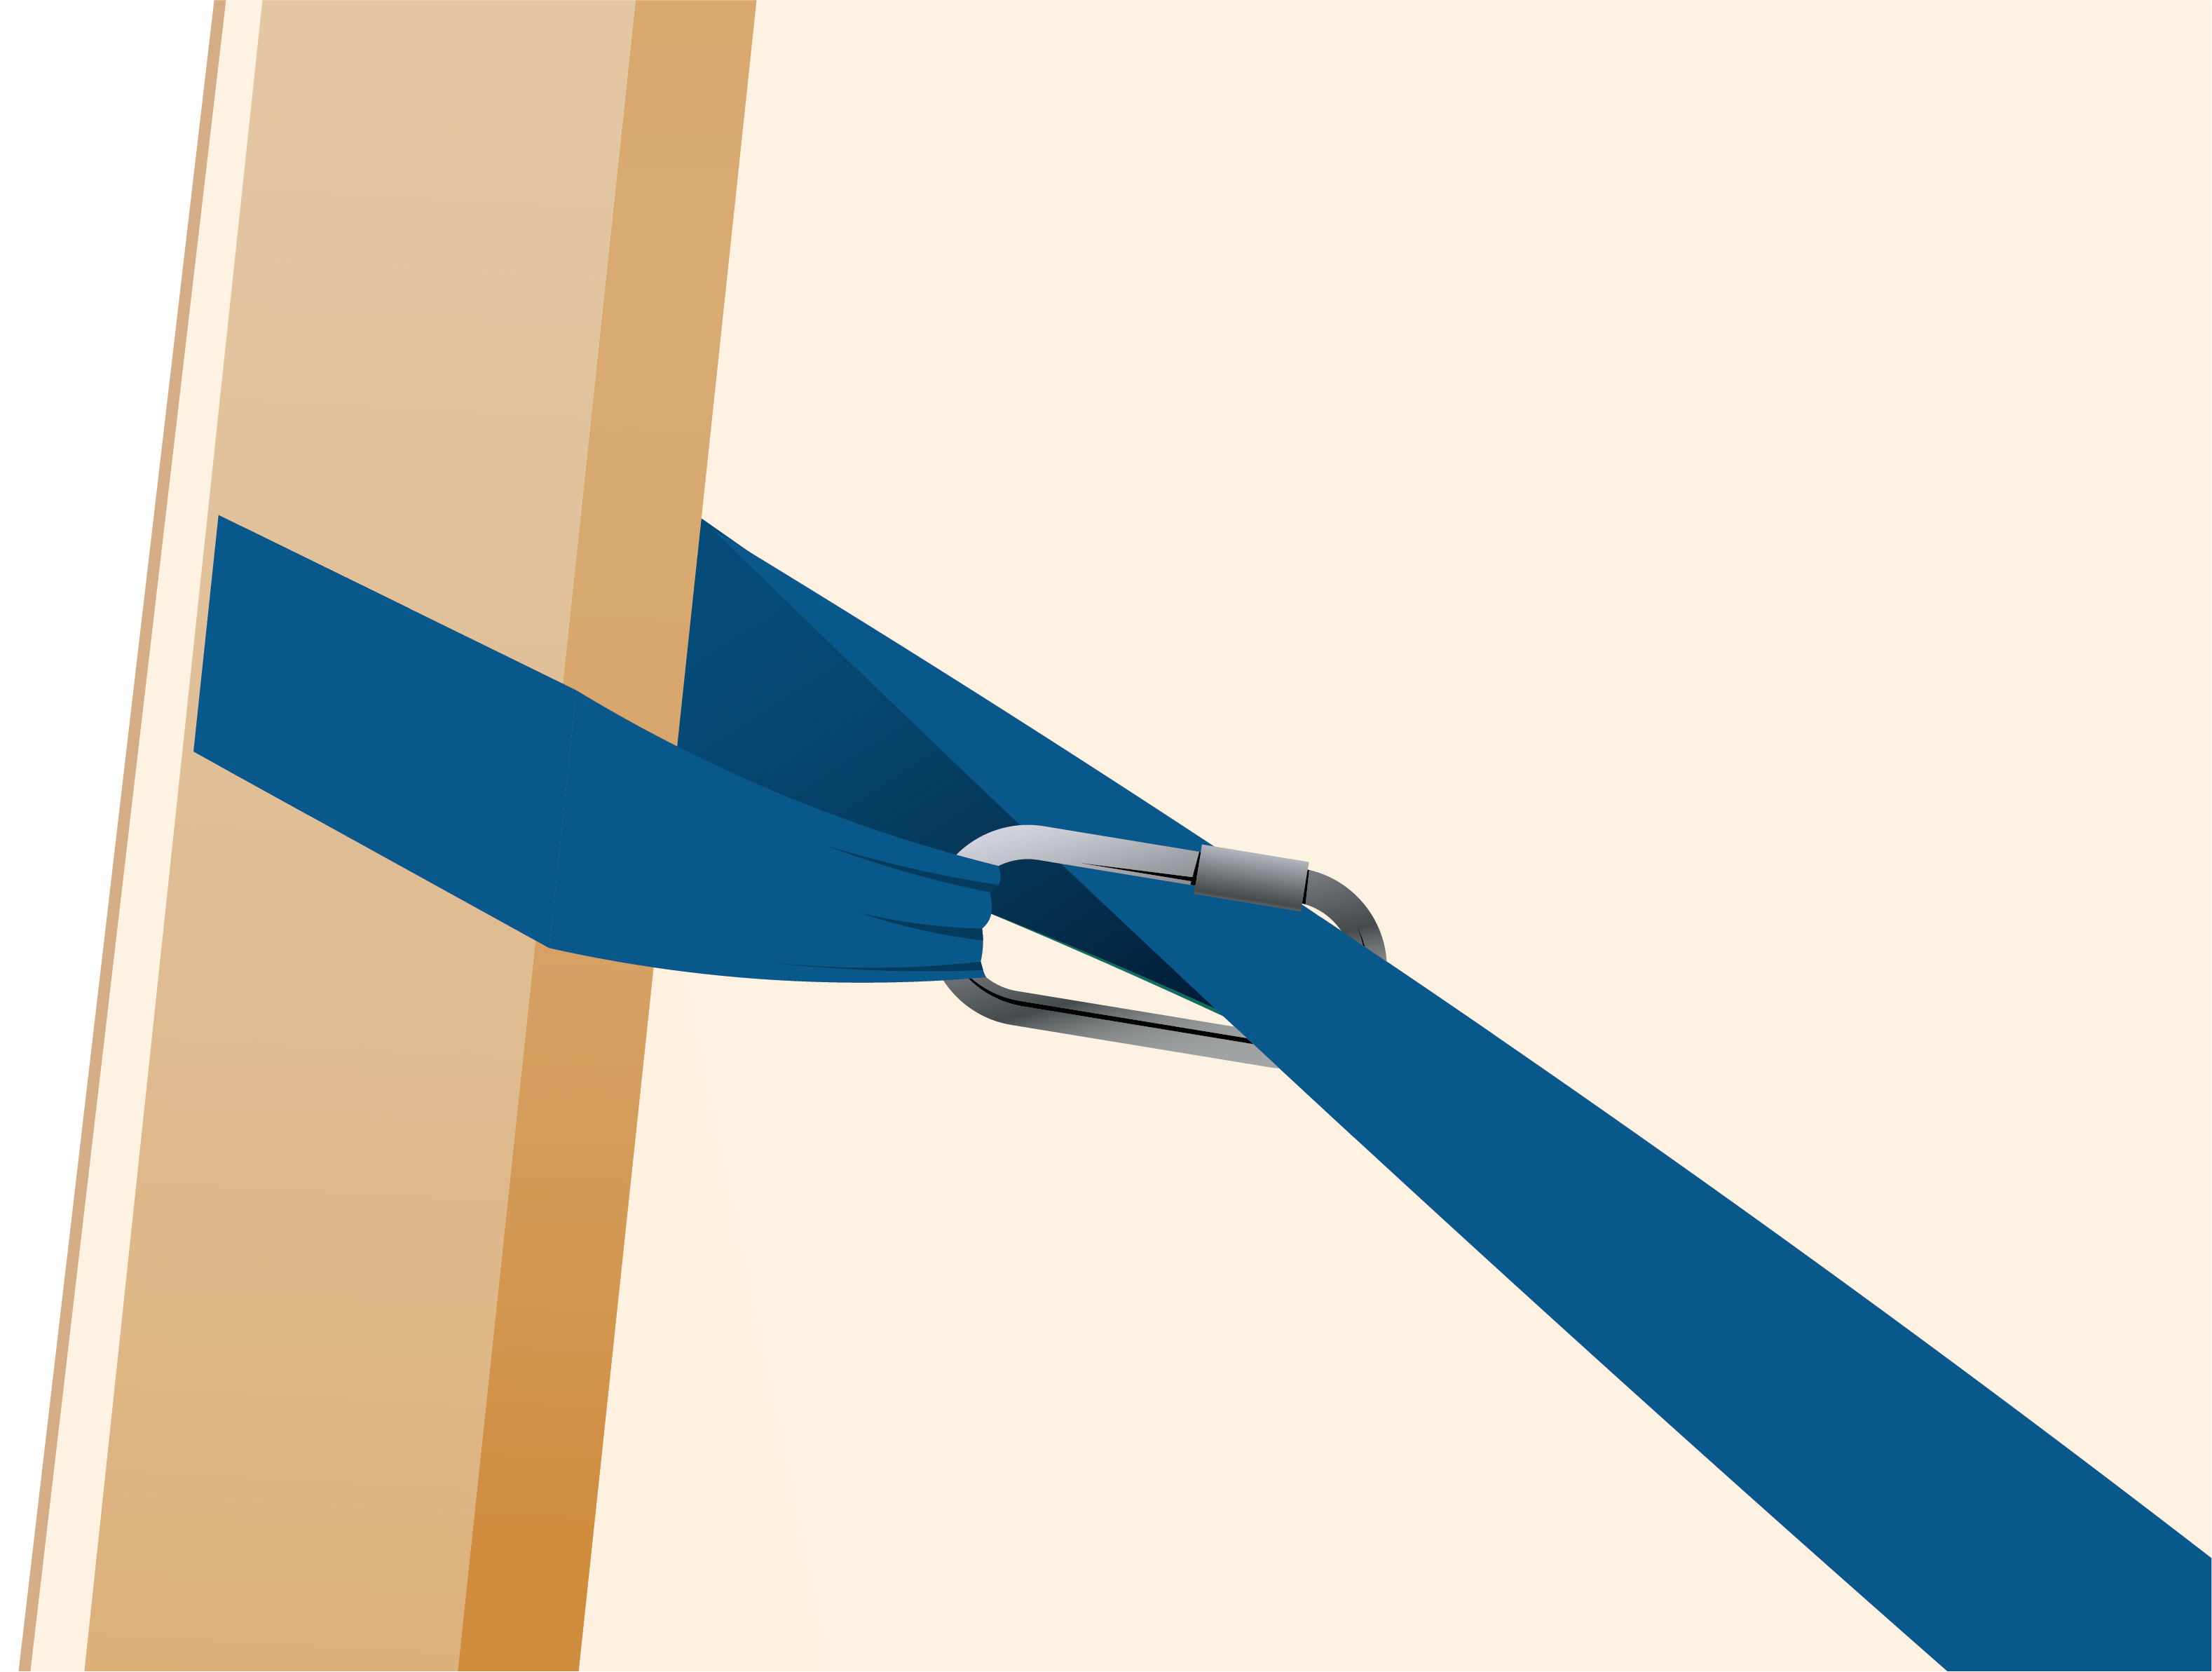
4. For the cargo net, use the included carabiner to attach.
4
Install The Solar Panels
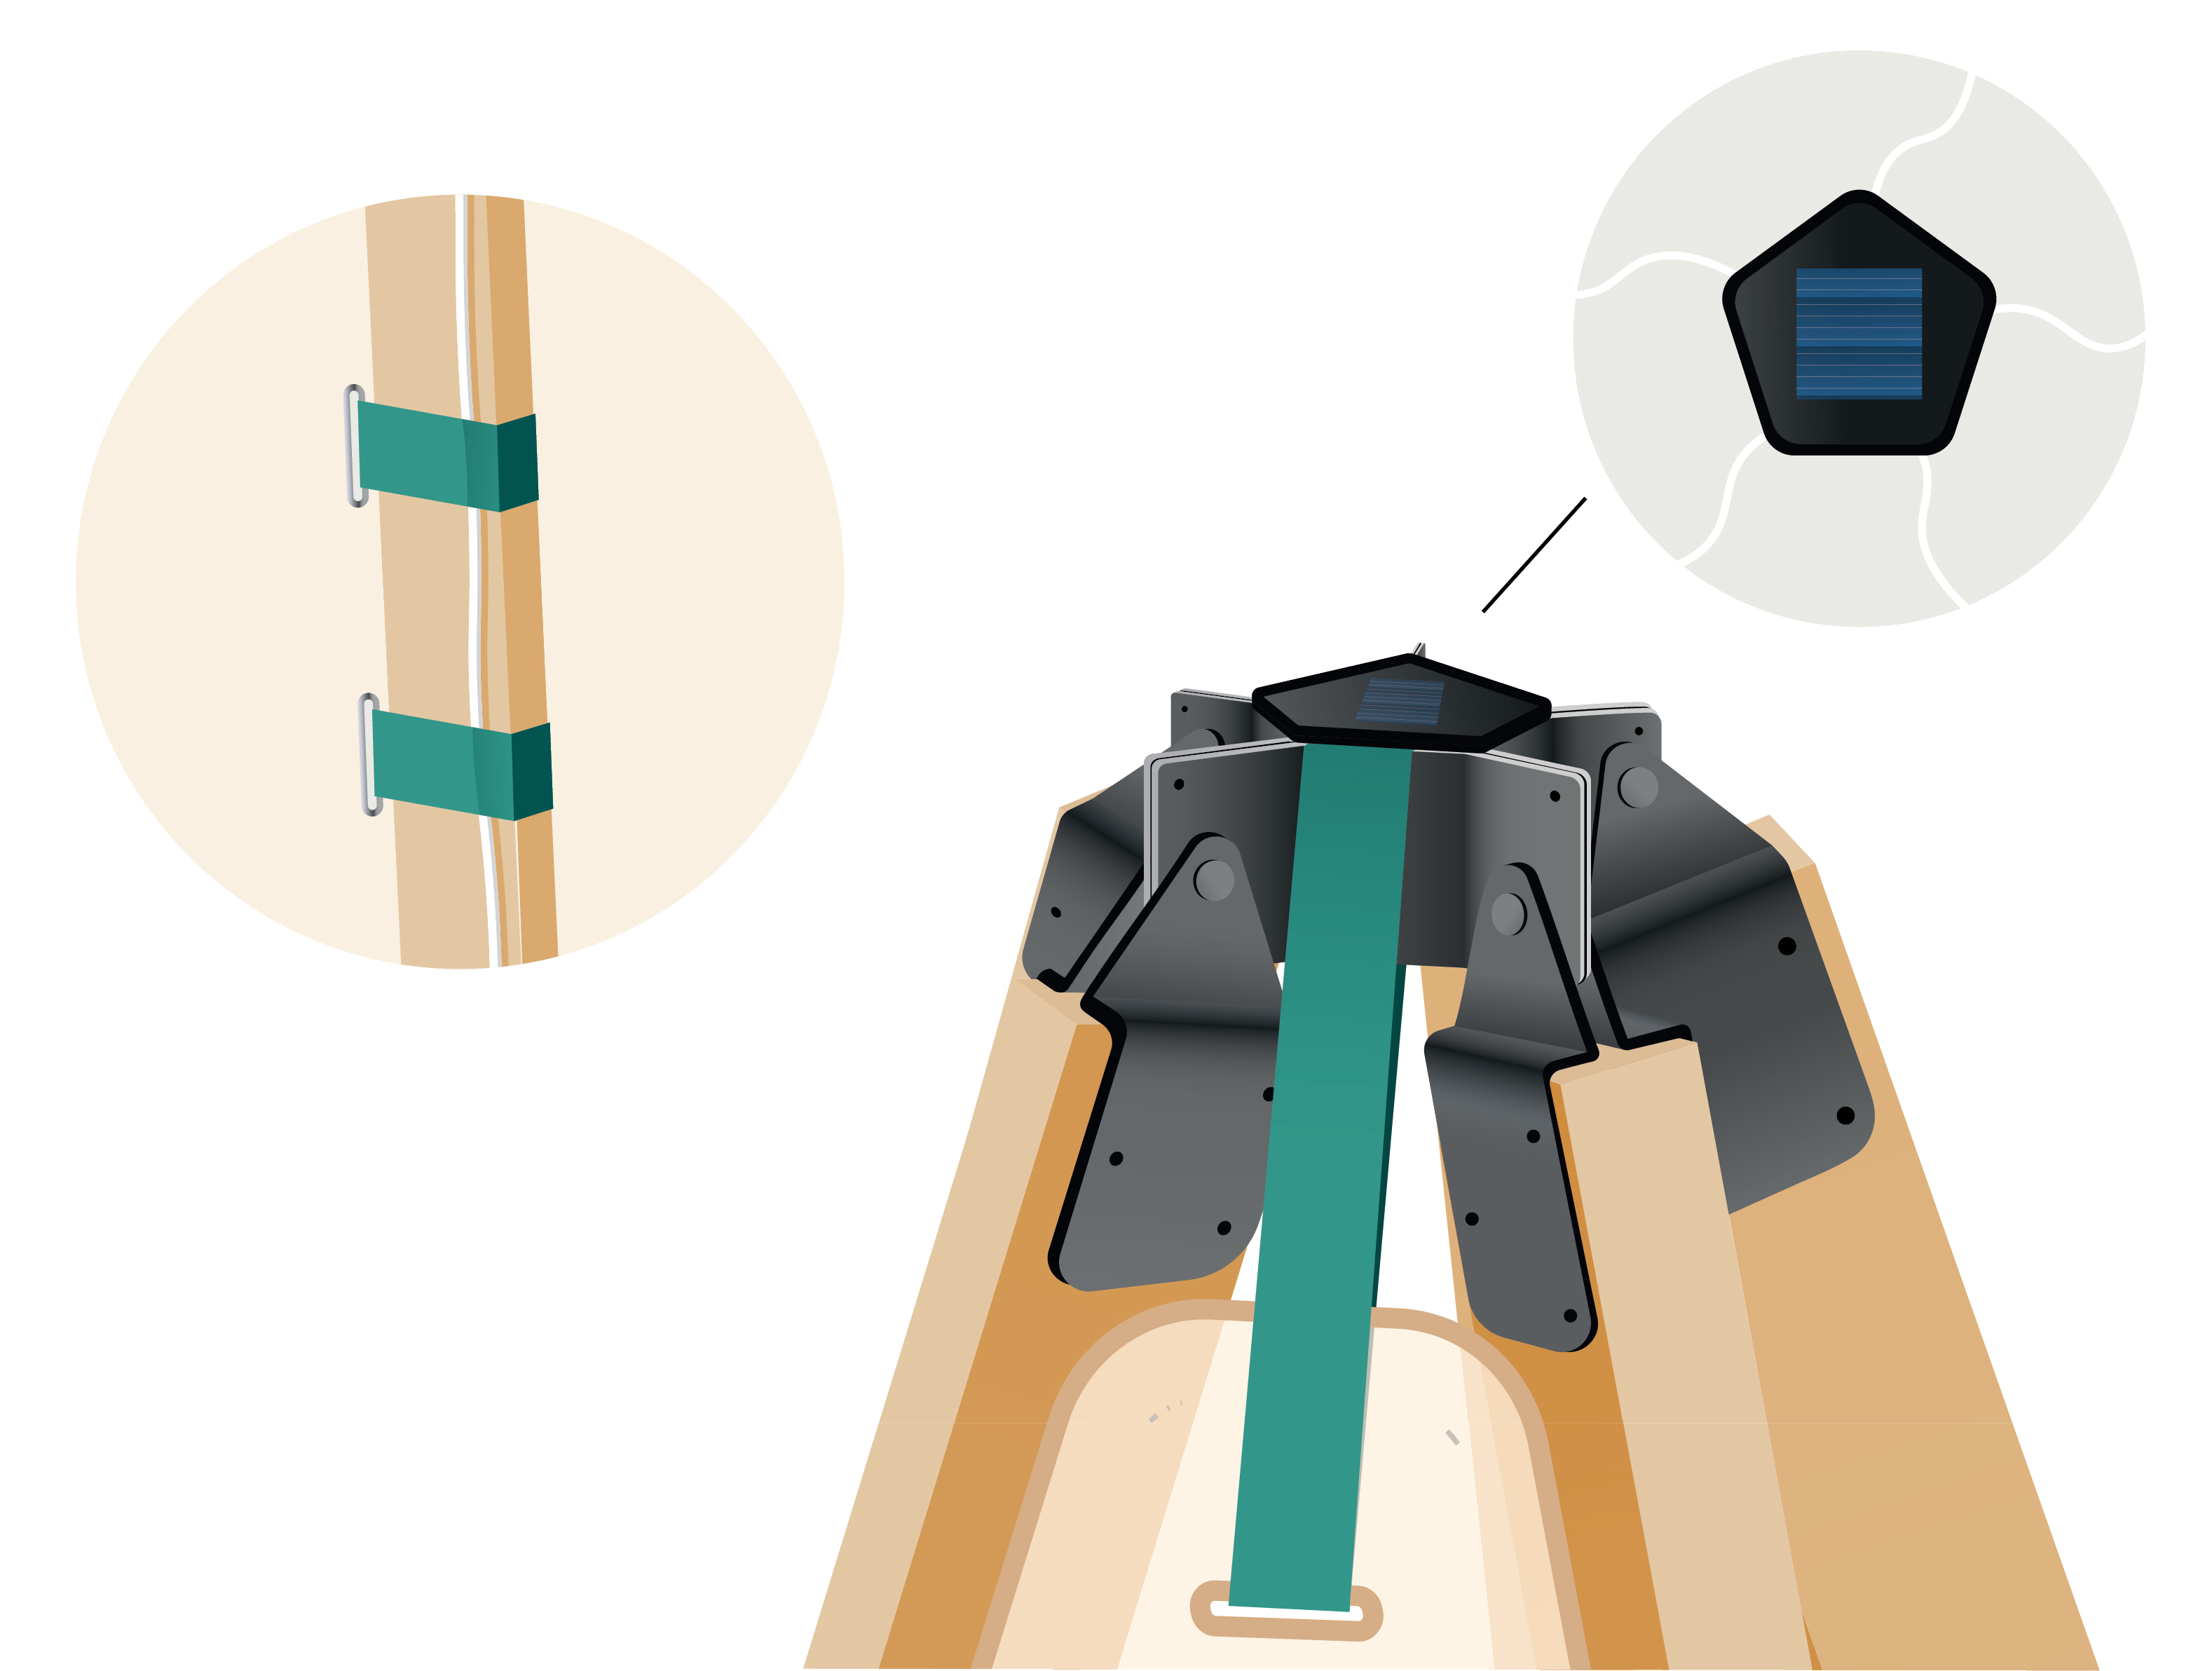
1. Insert the solar light strands through the hub and set your solar panel on top of the star hub.
2. Test the sensor lights by pushing the button on the back, then cover the panel with your hand to simulate night.
3. Each light strand should go under the velcro straps going down the legs.
Remember: Up to this point, you will only have attached the star hub straps, the first panel attachements and the first cargo net attachements.
4
Install The Solar Panels
5
Raise Your Bijou & Attach The Rest Of the Straps

1. Using two or more persons, stand up the Bijou.
2. Continue attaching the straps. Start at the top going down so you can reach under to help attach the straps. For
3. For panel to panel attachement, follow the same instructions in step
4. For panel to cargo net attachement, follow the same instructions in step 6.
Notes:
Remember to thread the light strands under the velcro straps.
You should not be able to see much of the wood once your panels are attached.
Cargo net straps should attach directly to the wood and not to any panel grommets.
6
Attach The First Panel To Panel Attachements With The Strap
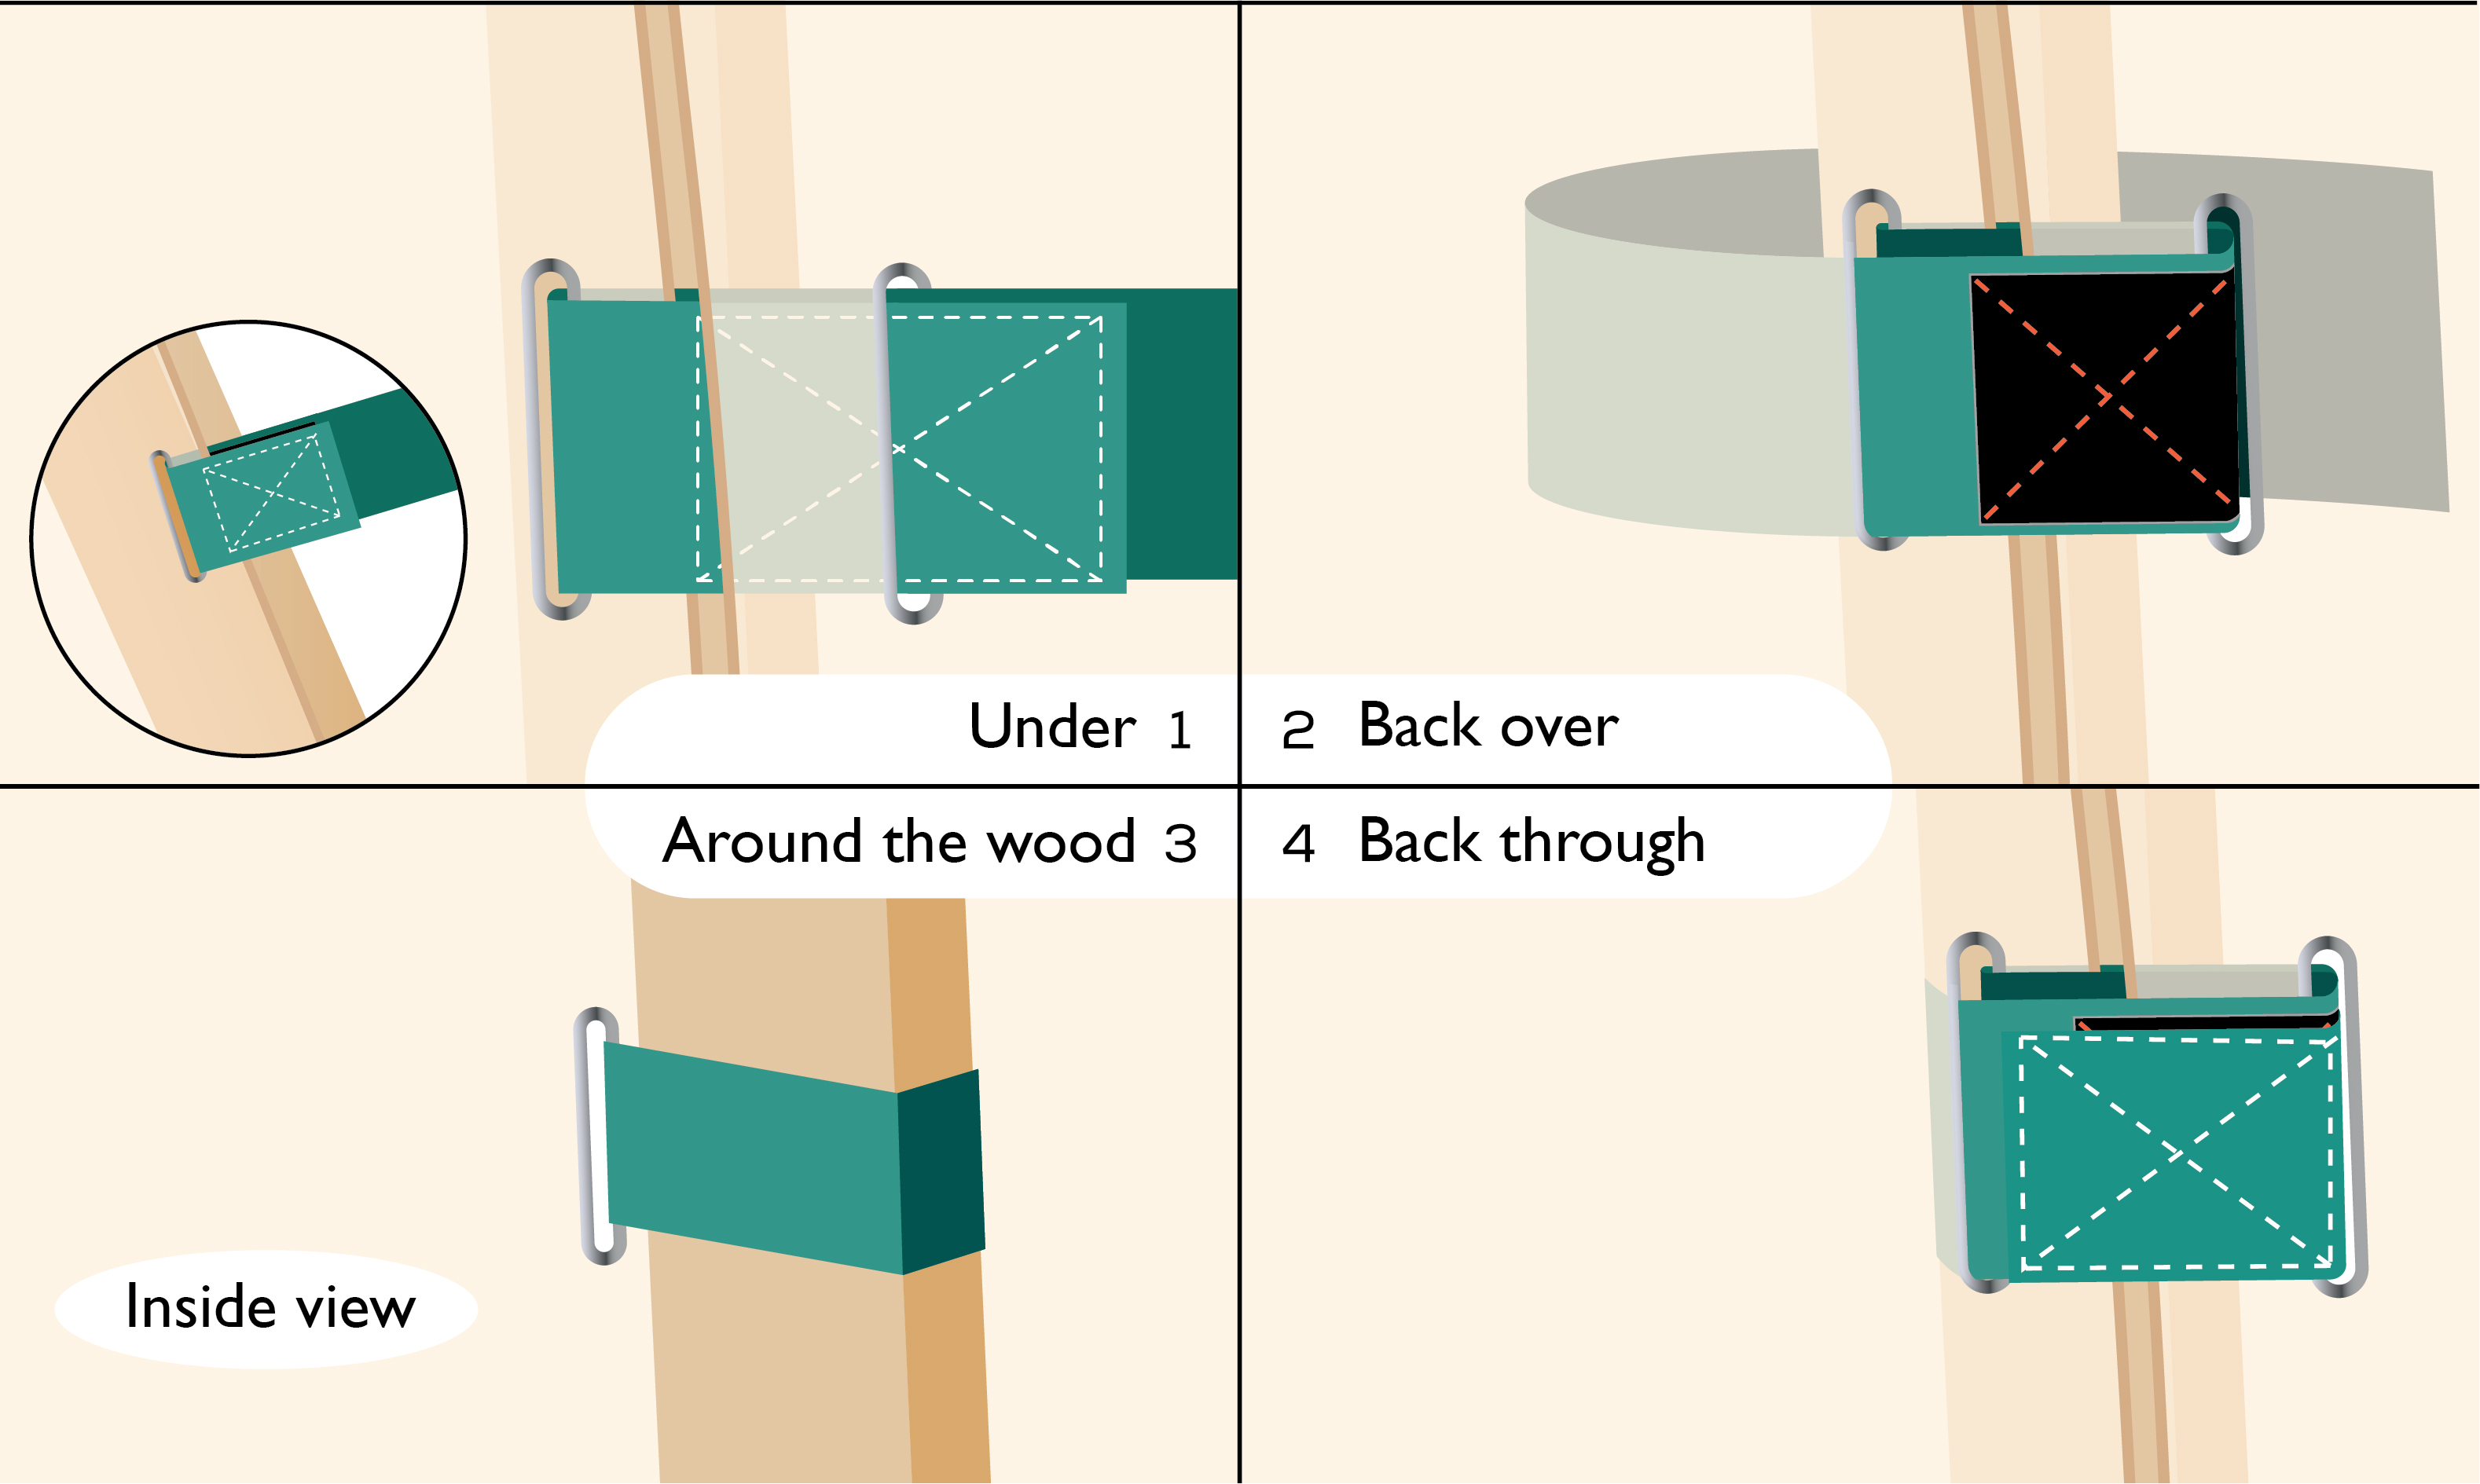
1. For panel to panel attachement, start with the end of the green strap on top.
2. Feed the strap under the opposing panel grommet.
3. Feed the strap back through the original grommet.
4. Loop the strap under and around the wood.
5. Feed the strap back through and attach it to the velcro.
Important: You will only be able attach the first panel strap down on each panel.
6
Attach The First Panel To Panel Attachements With The Strap
6-1
Attach The First Panel To Cargo Attachements With The Strap
6-1
Attach The First Panel To Cargo Attachements With The Strap
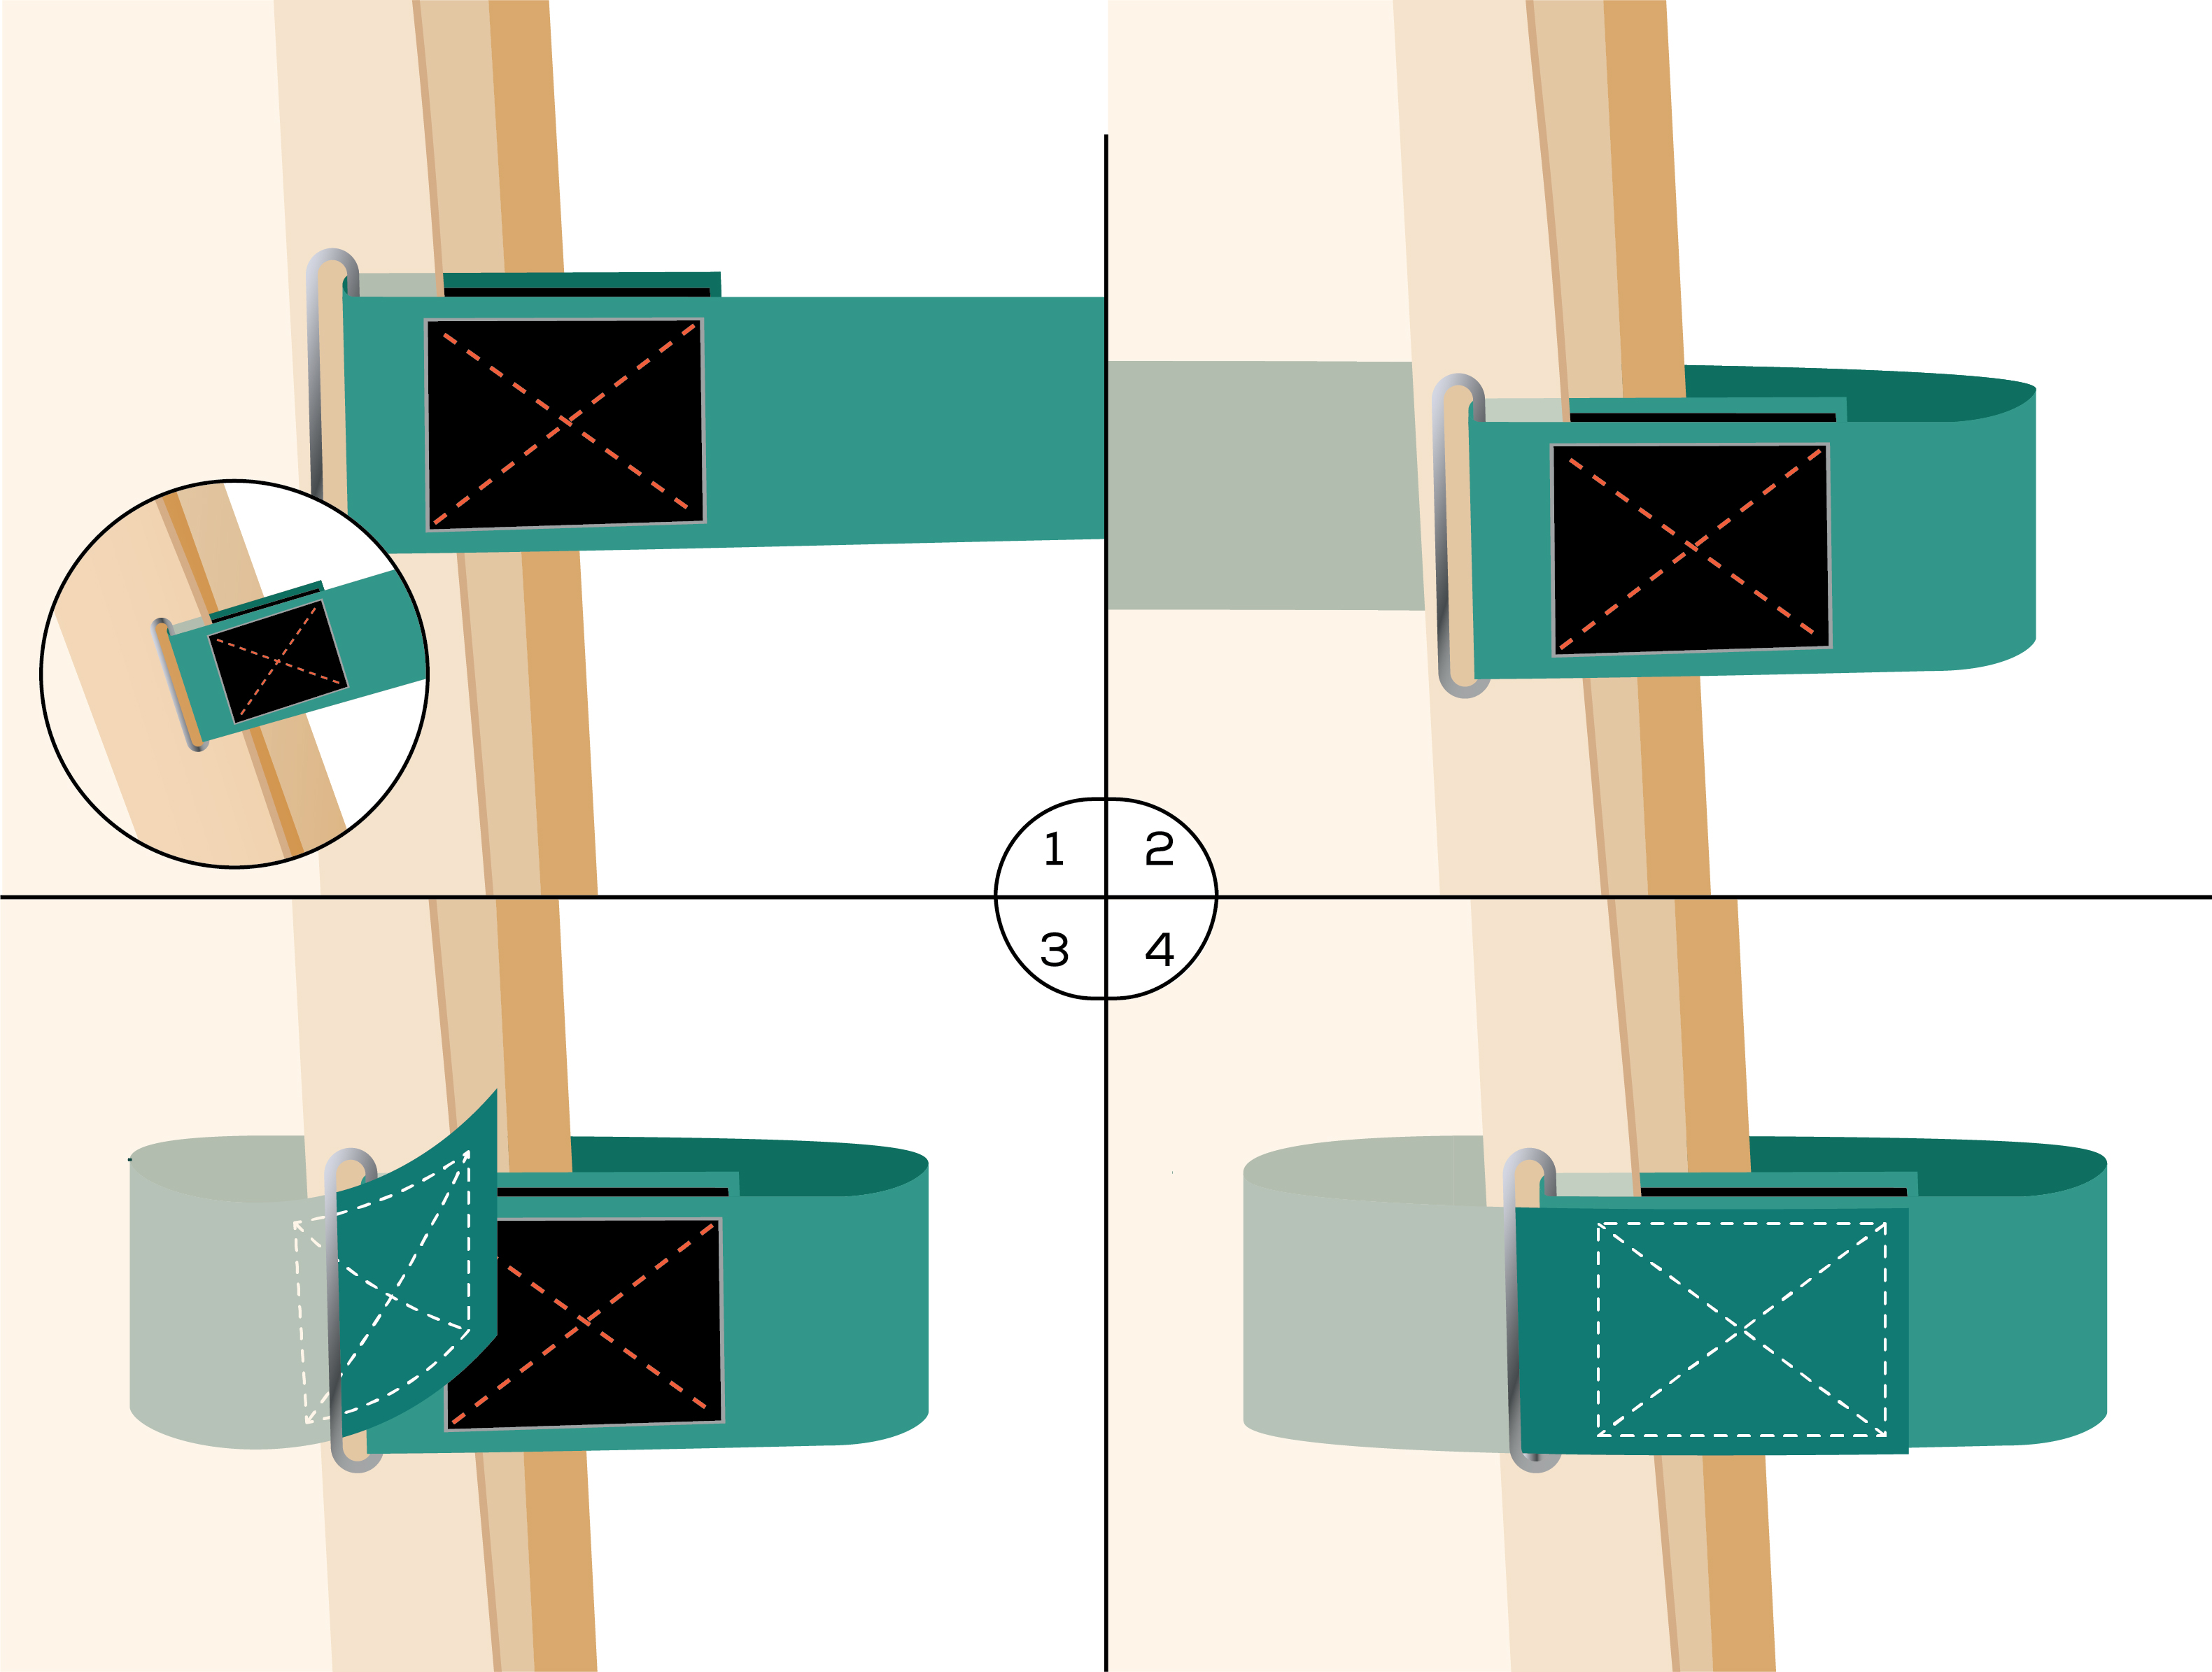
1. For the panel to cargo net side, start with the end of the green strap on the bottom
2. Wrap the strap around the wood
3. Feed the strap back through the original grommet.
4. Attach it to the velcro
Important: You will only be able attach the first panel to cargo strap down.
7
Attach The Cargo Net

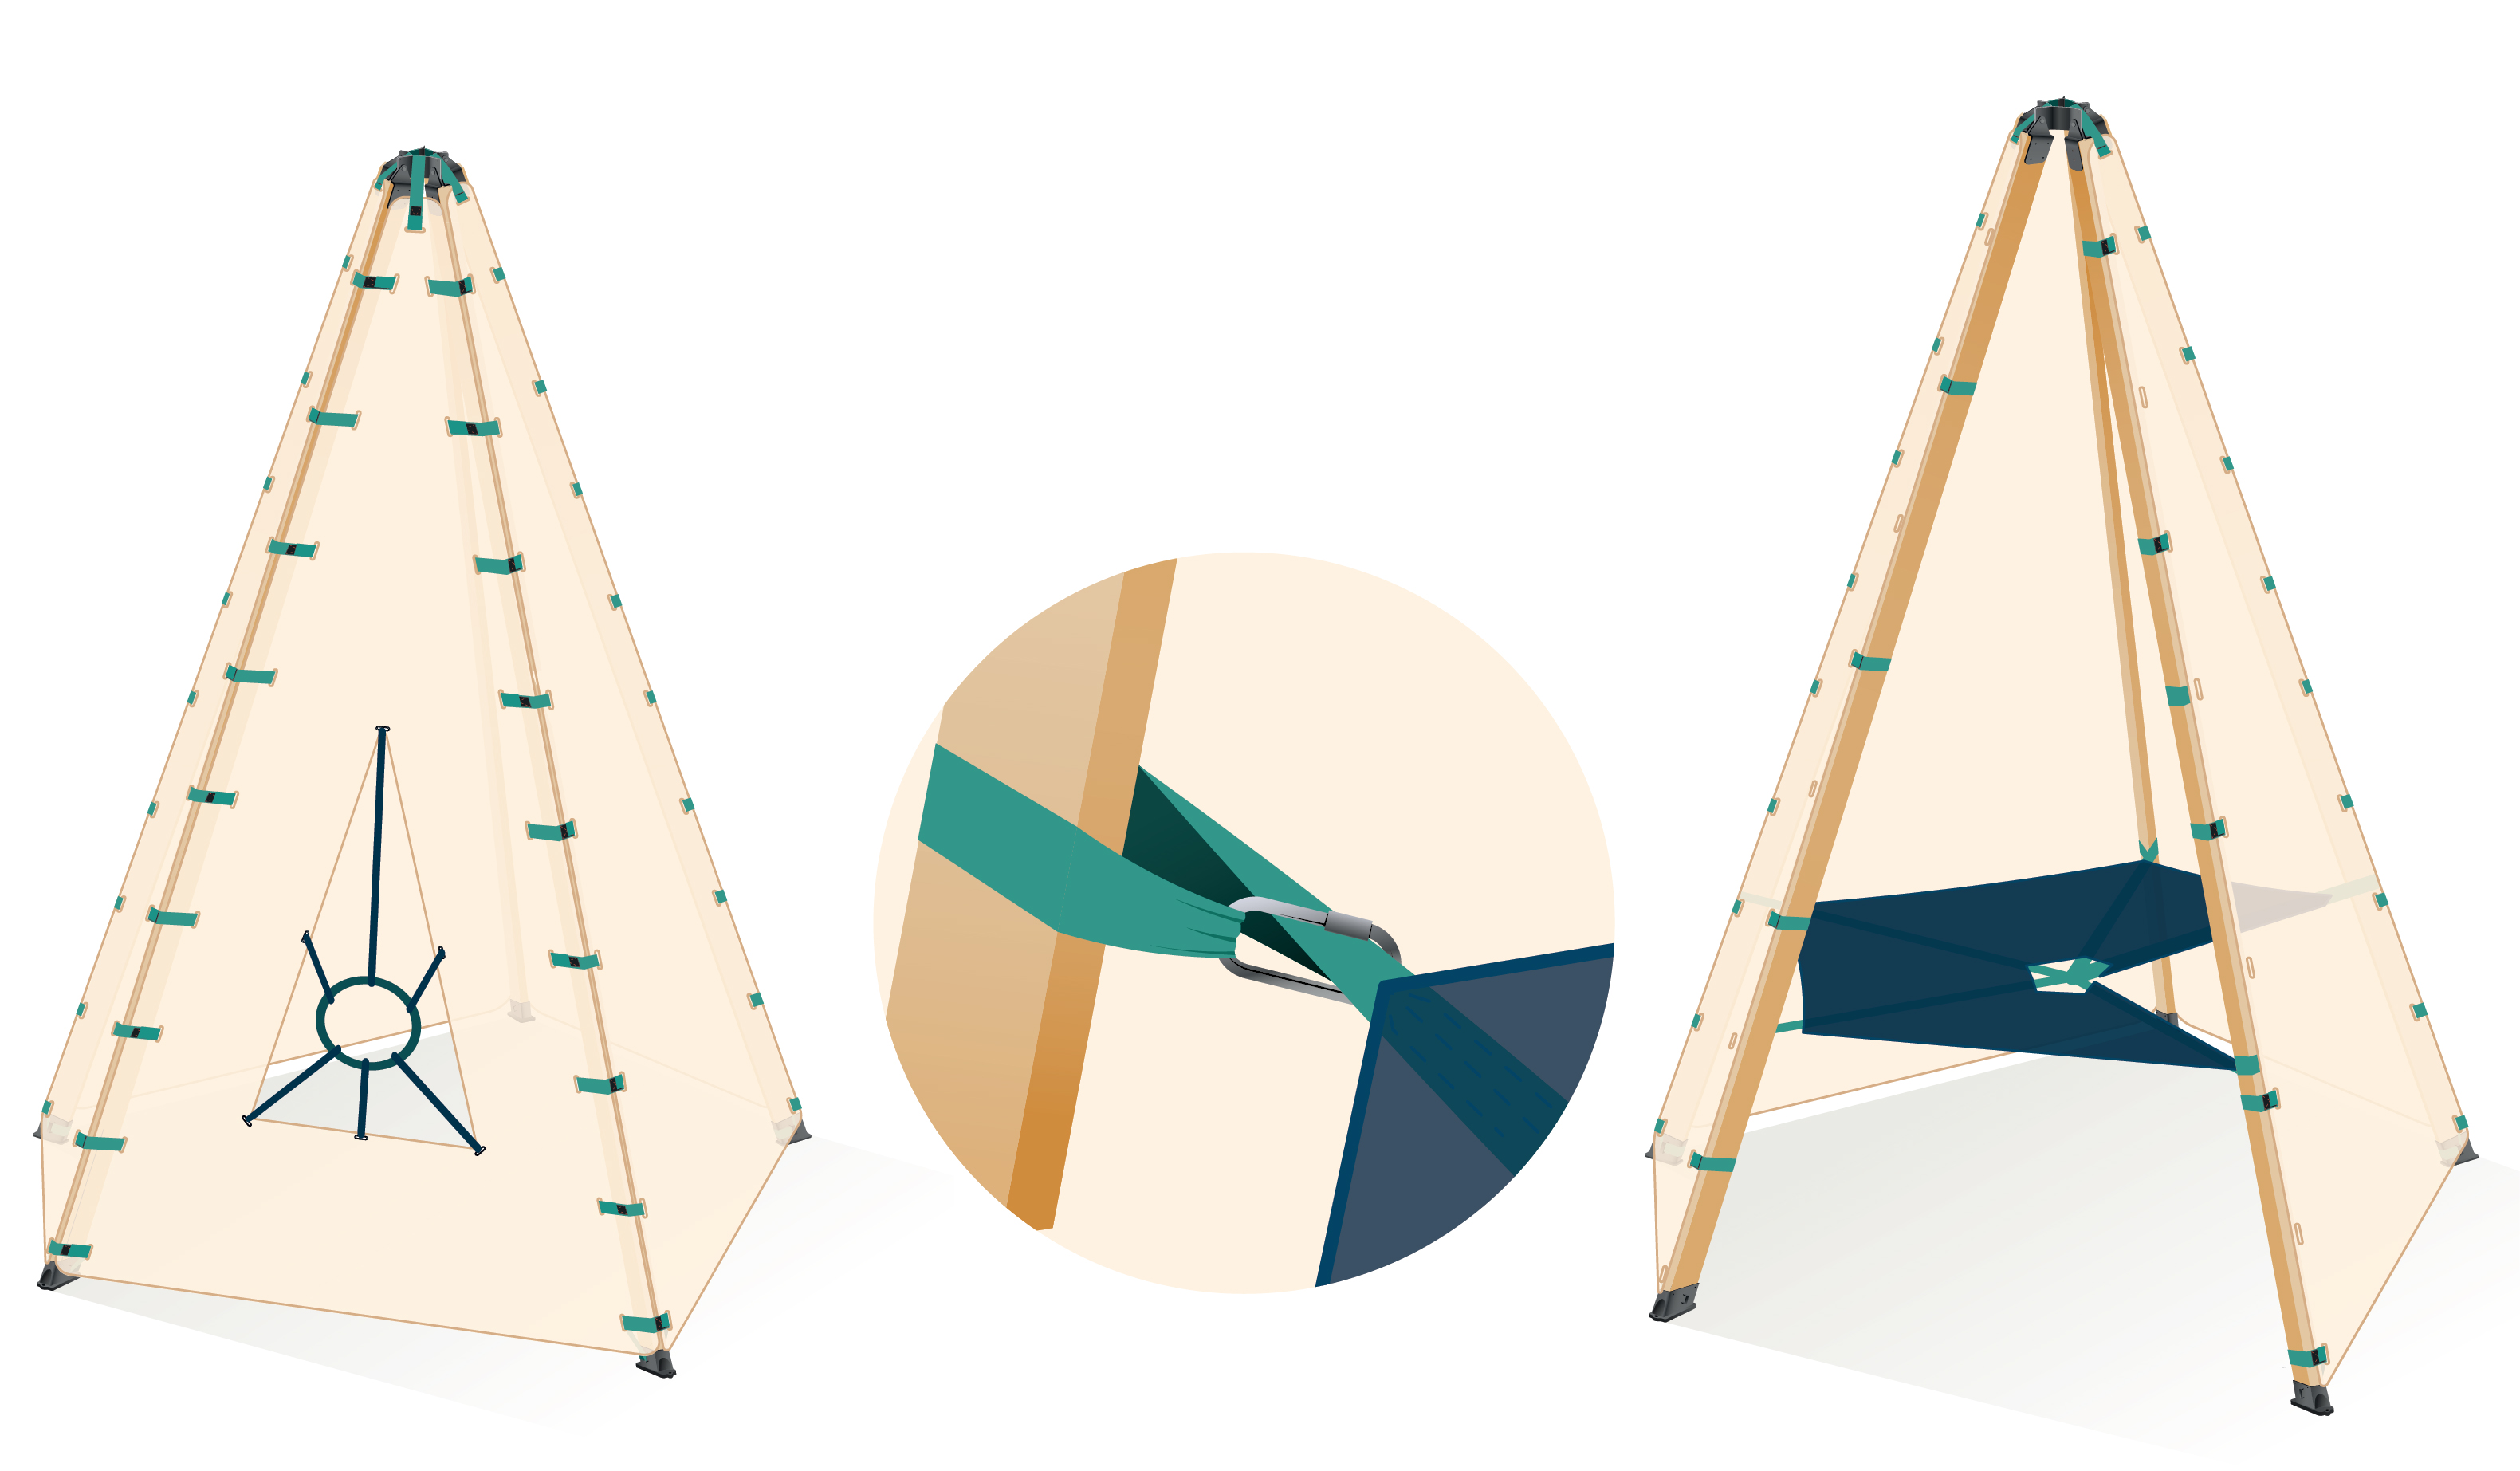
1. Clip the included carabiner back onto the strap to secure.
Note:
Cargo net straps should attach directly to the wood and not to any panel grommets.
8
Opening Bijou & installing
platform

1. With two adults, pull the legs of the Bijou out with each foot spaced 5' apart.
9
Anchoring the bijou

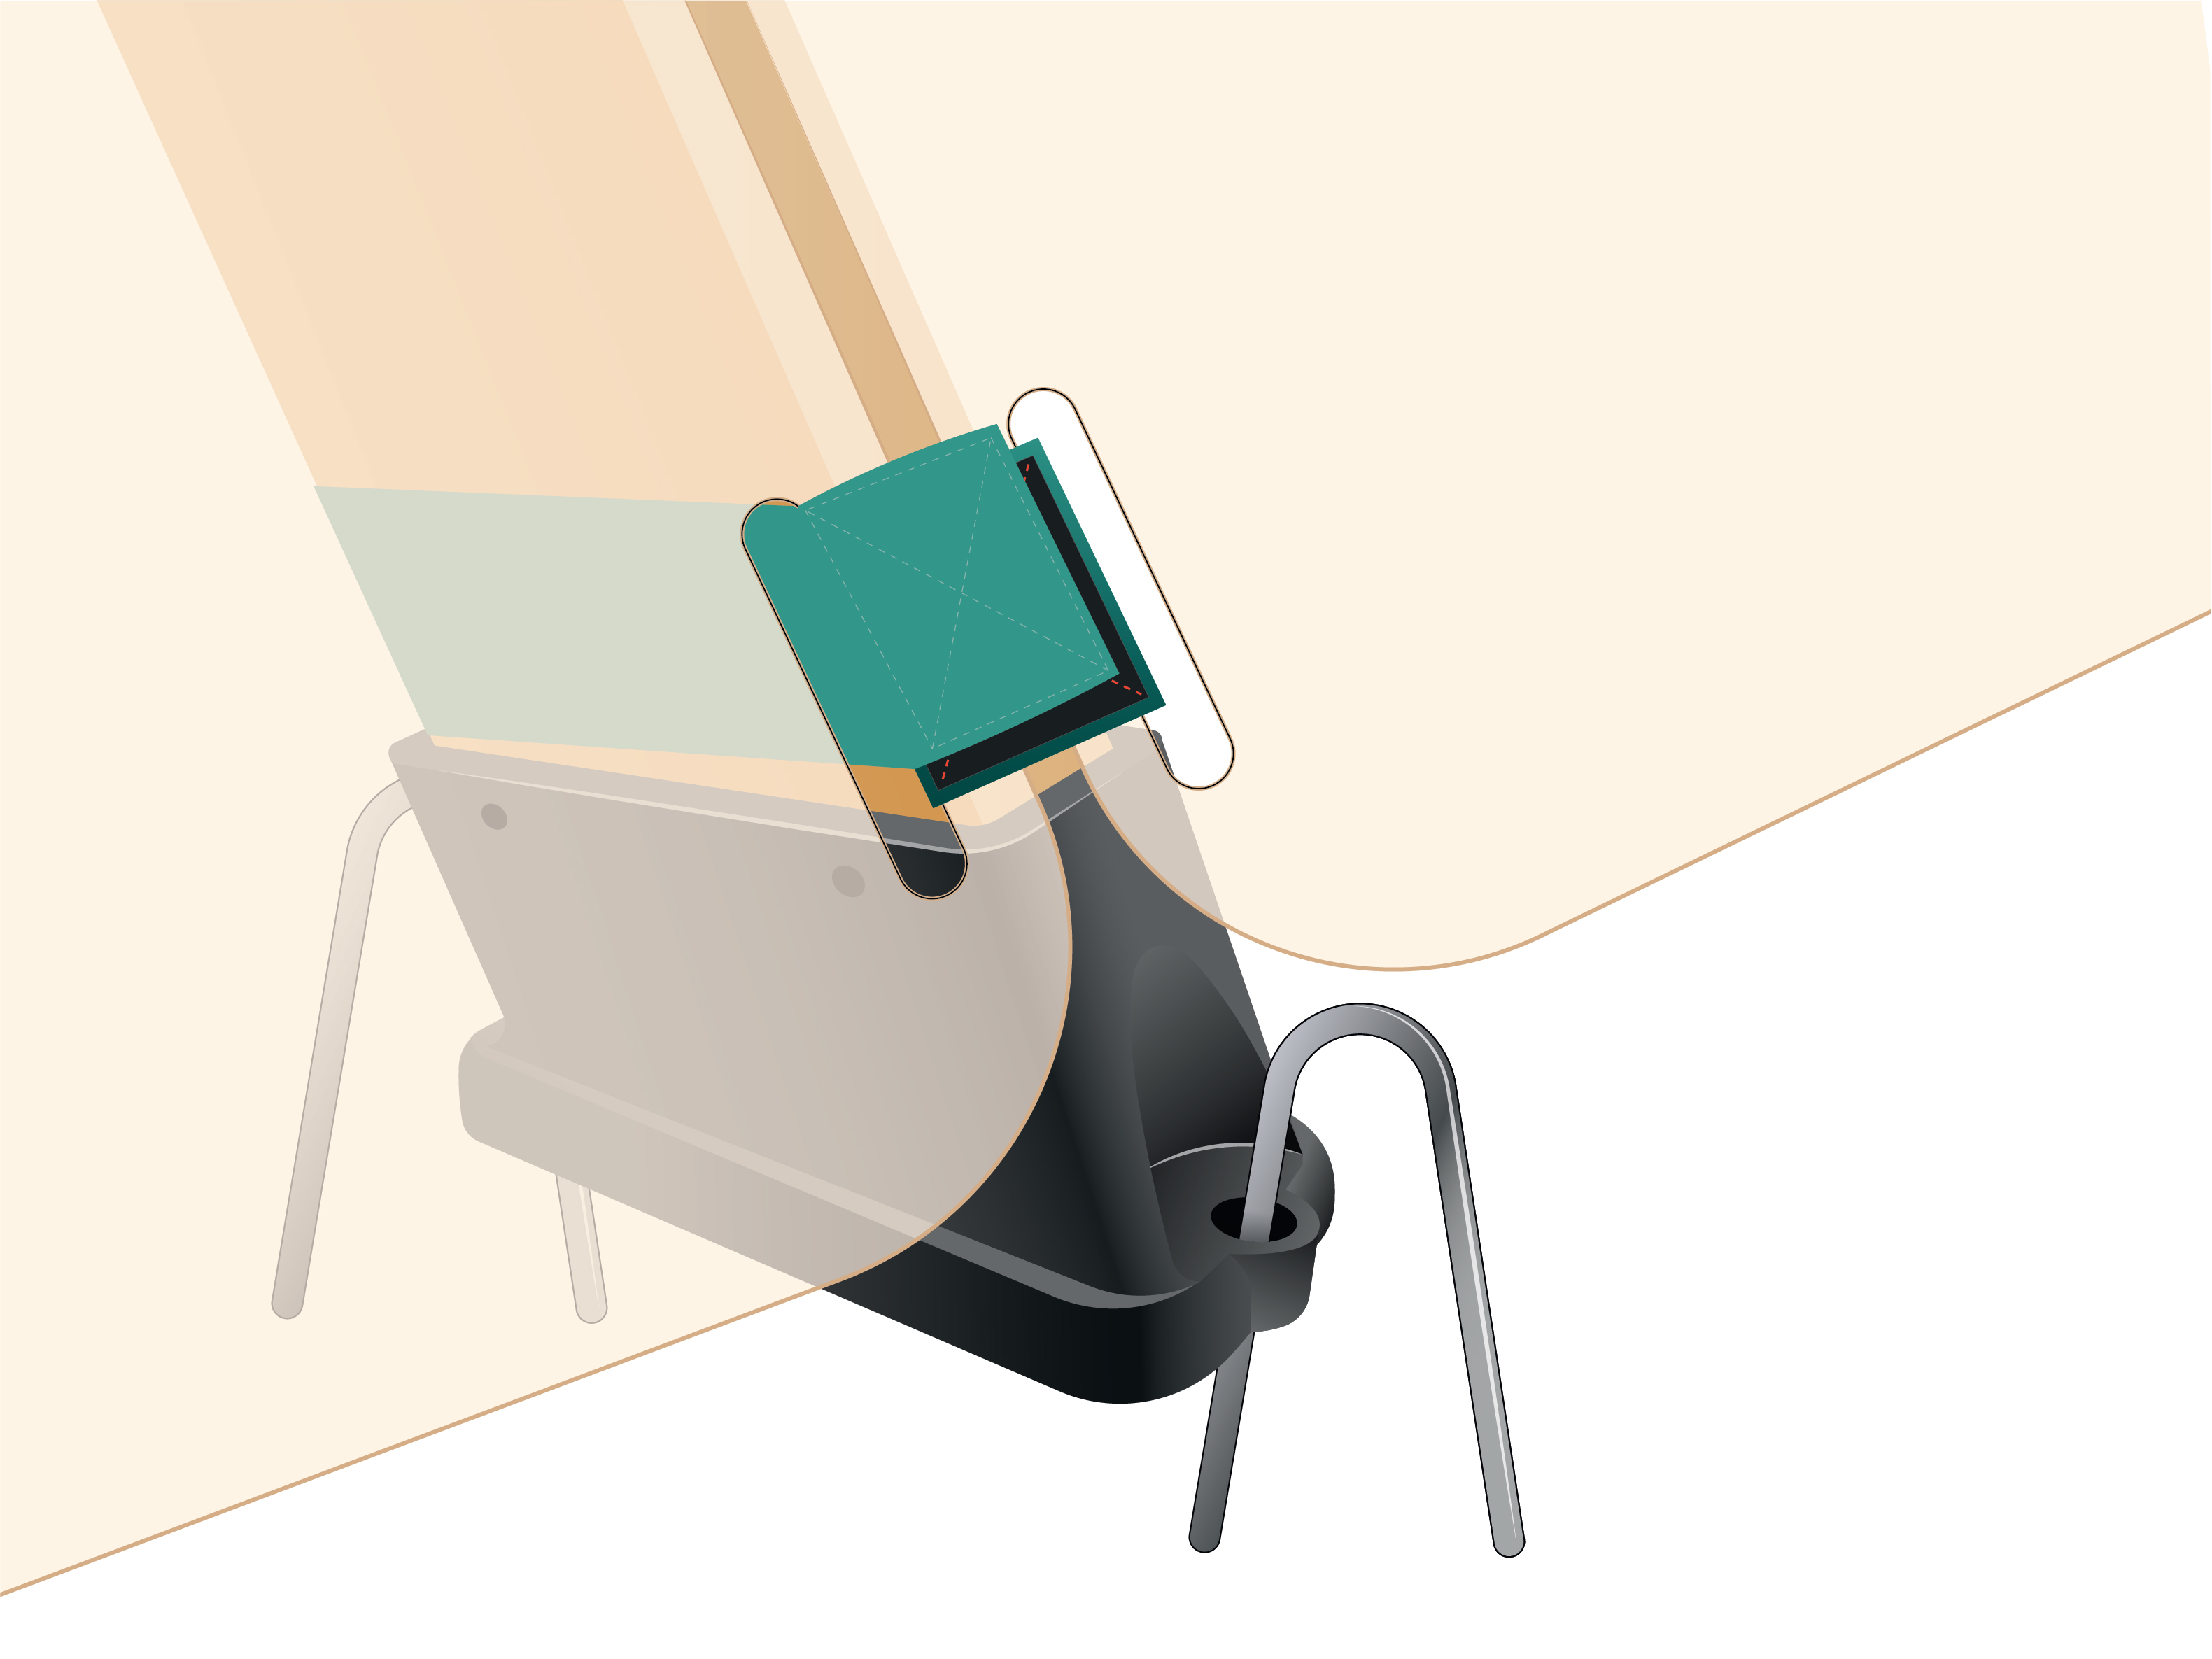
1. Wrap the straps around the 2x4's
2. Attach with the included carabiners
Note: The sewn in straps from the platform should be facing the ground.
Get The Next Level Platform For 2x The Fun
Get The Next Level
10
Collapsing the Bijou

1. With two or more adults, pull the legs outward from the base until the panels are tight.
2. Anchor the feet with the included u-stakes.
11
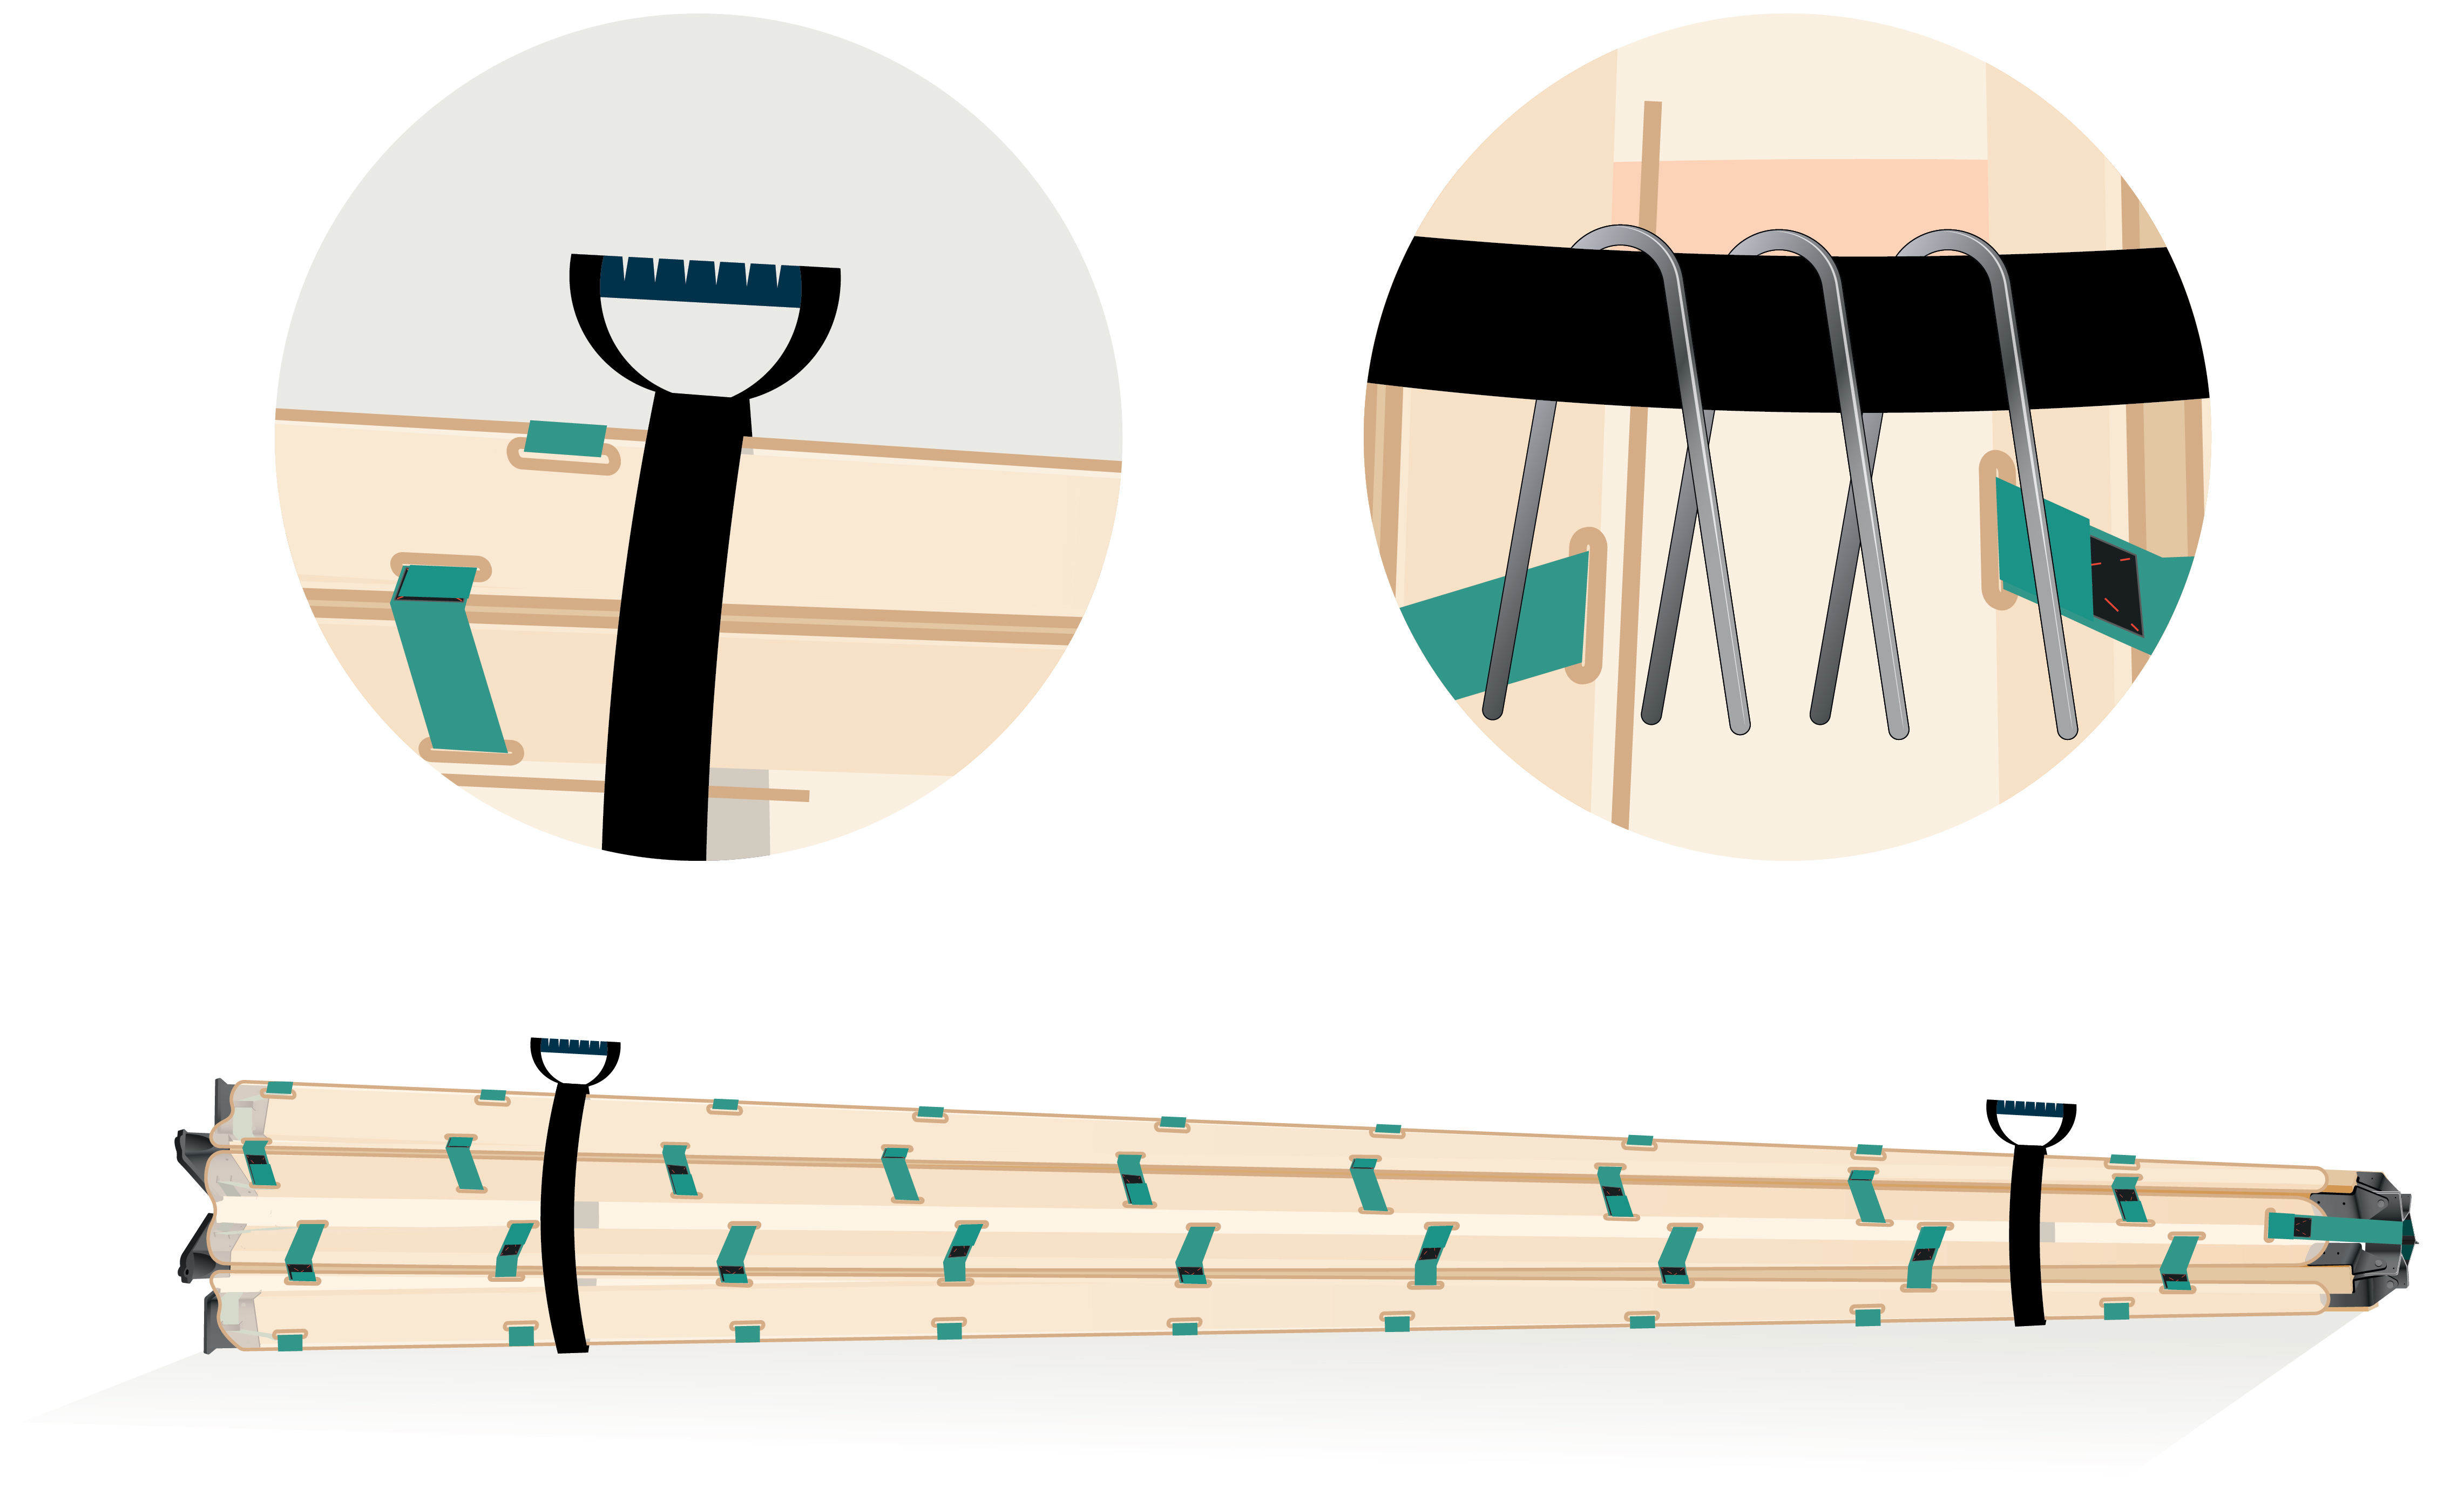
Storing Your Bijou

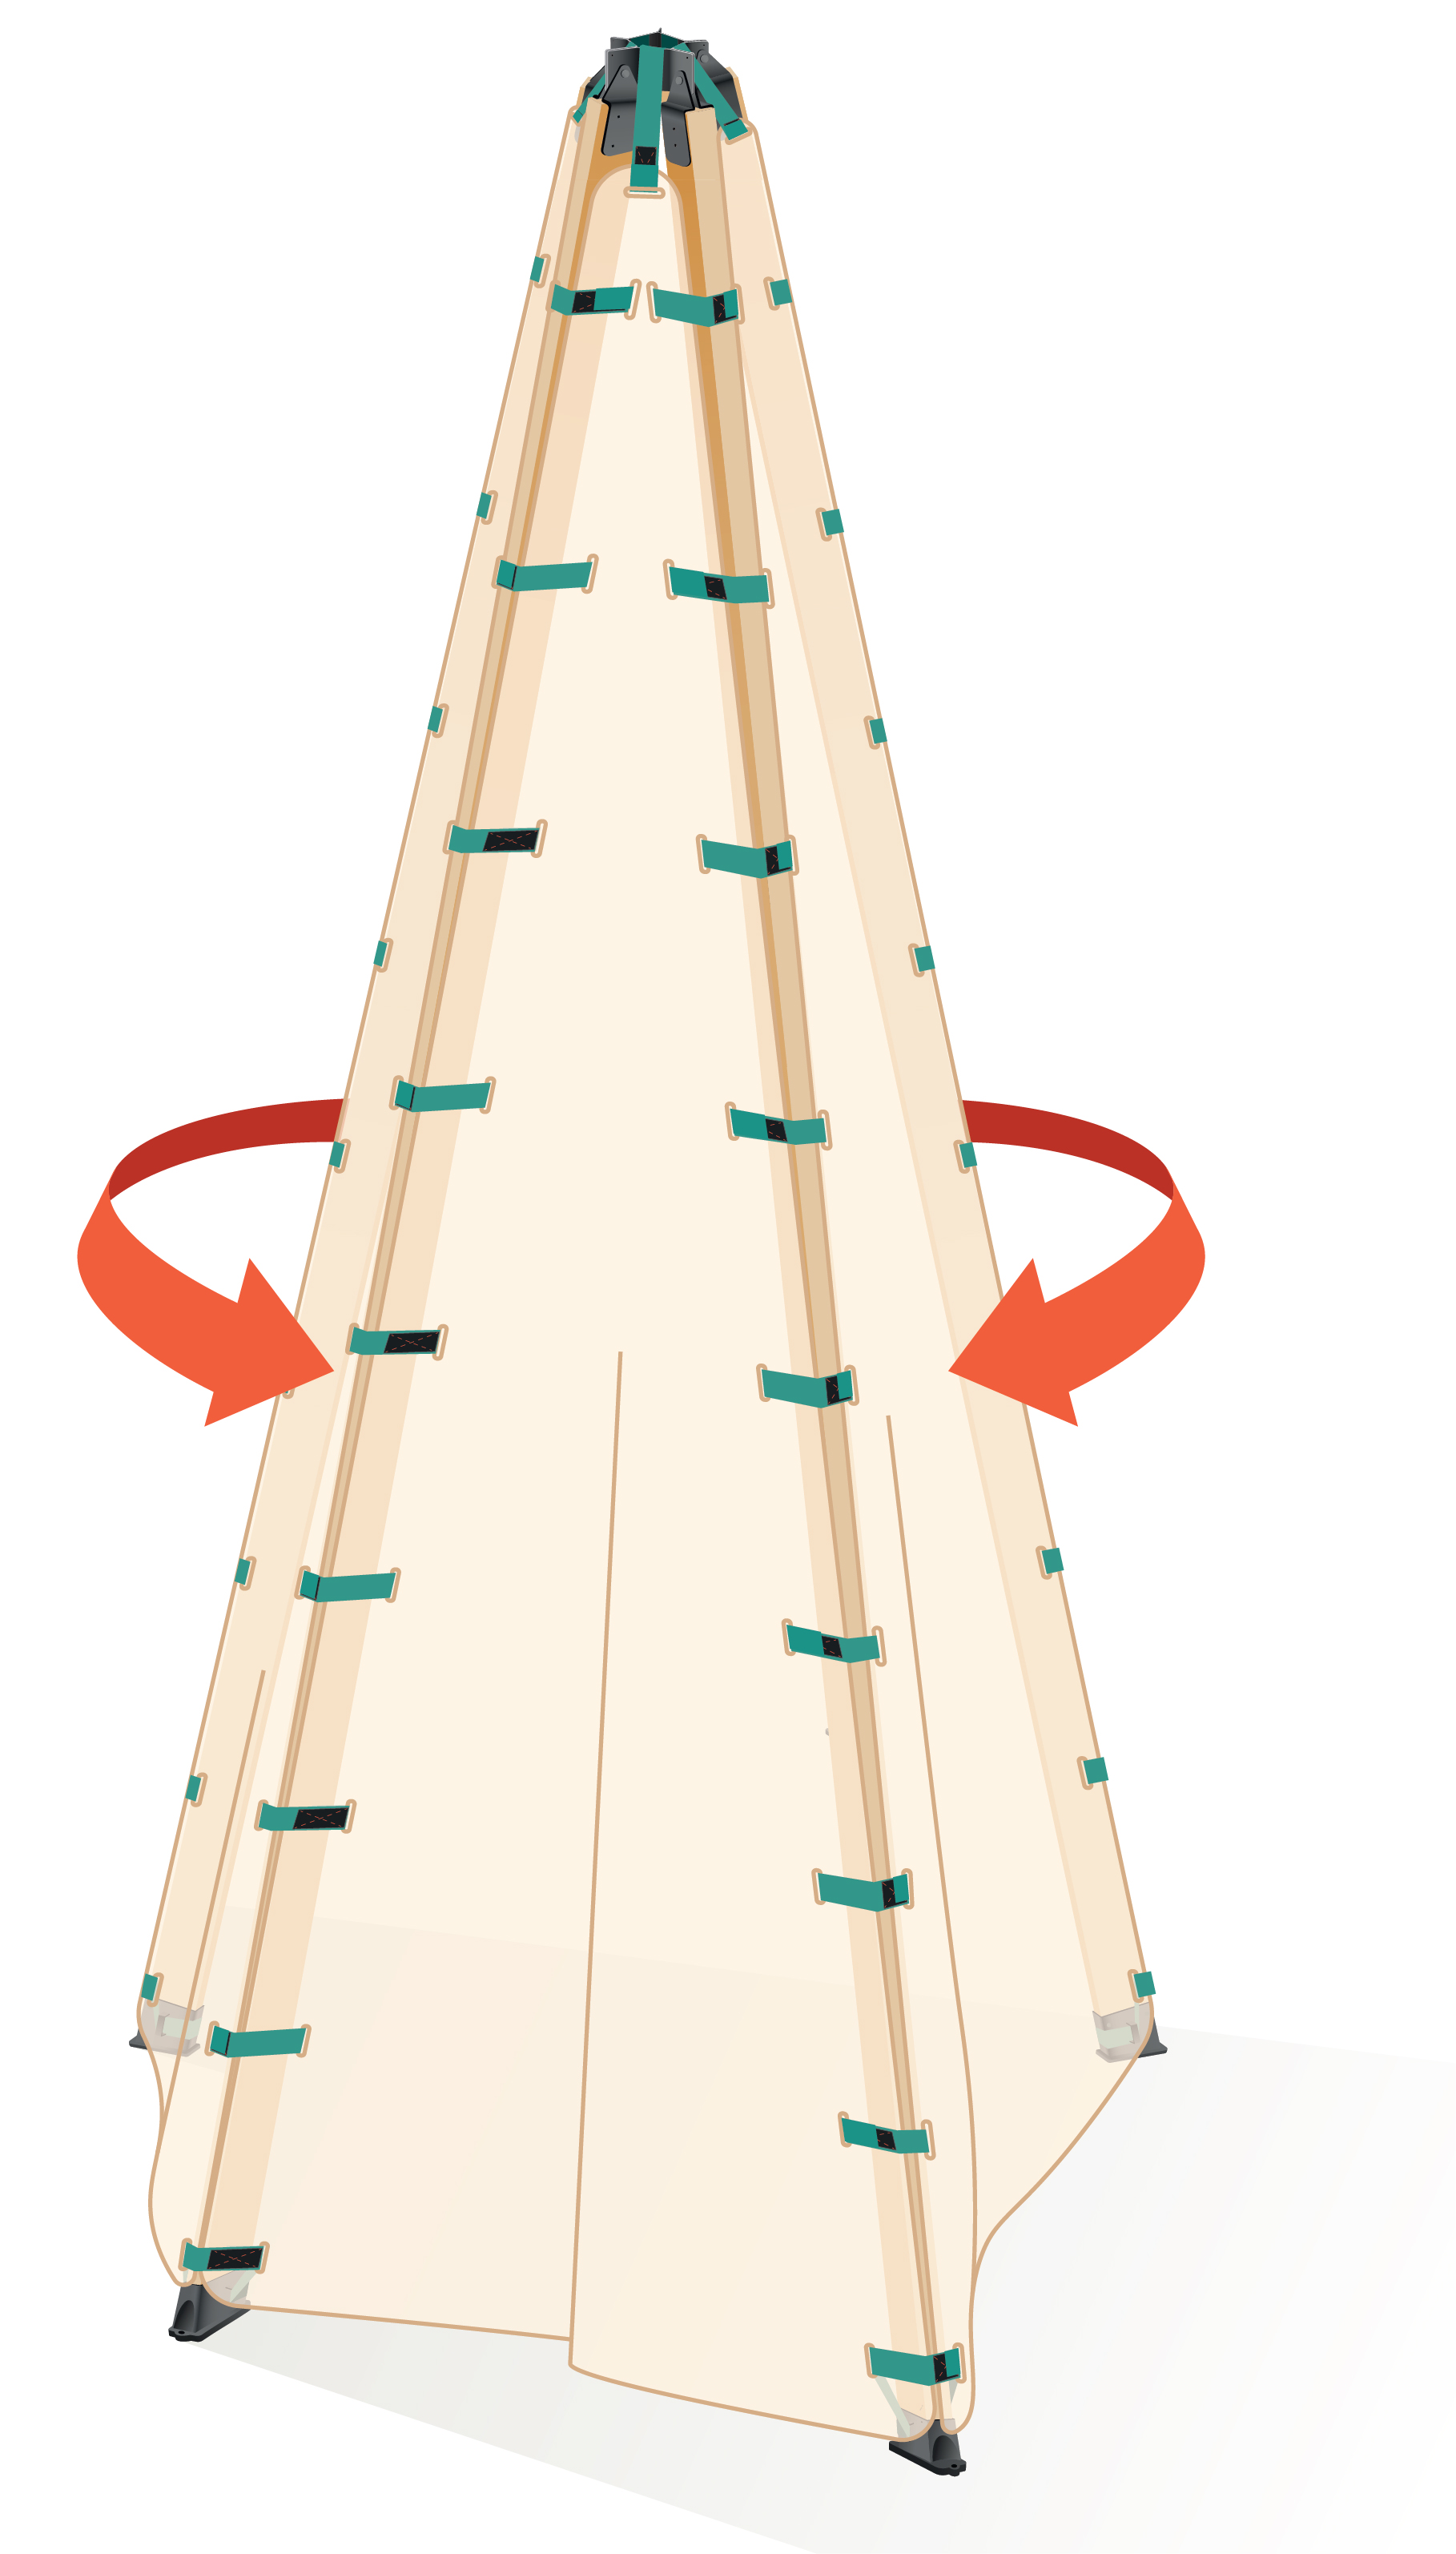
1. Remove the ground stakes
2. Walk the legs toward each other until the Bijou closes.
3. Velcro the included straps with carrying handles facing up.
Easily transport your Mainstay or Haven with our Bijou Roller.
Get The Bijou Roller

